Monday, October 25, 2010

Apricot and Date Rocky Road

Food shopping is one of my major hobbies/activities here. Somedays it's what keeps me going--when I'm feeling a bit culture shocked, there's nothing like having a friendly interaction with a market stall person and picking up some beautiful produce.
Although the outdoor market in St. Germain is quite large, I've chosen my regular stands, and the merchants seem to recognize and appreciate that. They greet me more or less effusively, joke with me, correct my French, ask me what's for dinner. I try to stay on their good side by using a list so that I don't waste their time and giving them exact change. Soon I'll probably start bringing them cookies, just like David Lebovitz. But in the meantime, I see the market experience as part of my linguistic and cultural education. And we eat pretty darned well, too.

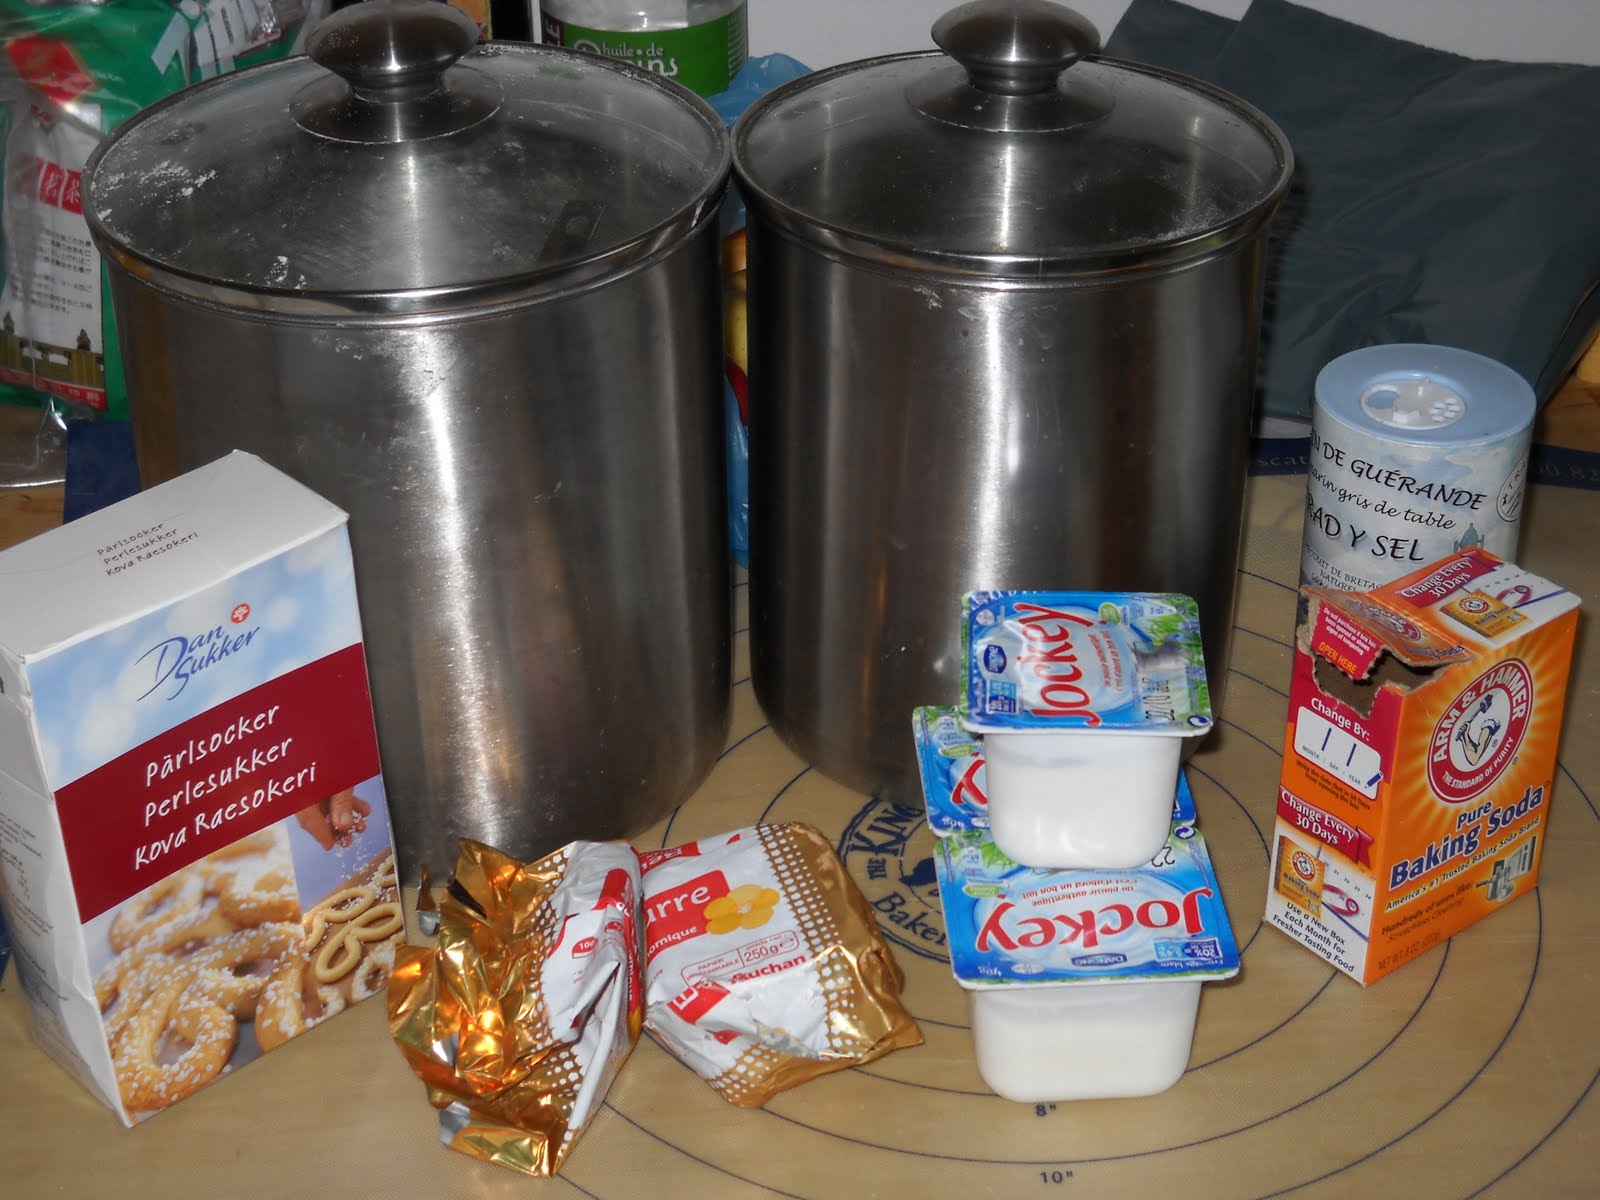
So, you say, what has this to do with Maida Heatter recipes? Well, look above. All these ingredients for the rocky road were carefully sourced from the market or from local shops. Those are hand-crafted marshmallows you see there. And single-origin chocolate. This is some high-class candy I'm making!

I have to say that I was skeptical about this recipe, until I went to my favorite chocolatier and discovered these really yummy chocolate, fruit, and nut clusters. His had apricots, candied ginger, orange peel, and almonds. Yum. So I figured this could be really good as well.

It's not a difficult recipe to make, once you've cut up all your ingredients. And it's rather festive as well.

I don't have an 8-inch pan, so I improvised. It was fine, but perhaps in a more enclosed space the chocolate would have distributed itself more evenly among all the fruits and nuts.

But in general, there were a couple of problems with this candy: 1) it didn't cut neatly; 2) it was therefore too easy to take little nibbles. Julia and I especially couldn't keep our hands off of it. But we agreed that if I were to make this again, I would leave out the dates for more nuts and/or a different kind of dried fruit. The dates were a bit too sweet to be covered in chocolate.

So here's the recipe. Get the best ingredients from your favorite merchants and try to give this away before you eat it all.

Apricot and Date Rocky Road

about 14 large marshmallows
10 pitted dates
10-12 dried apricots (I think the Mediterranean kind might be best for this use)
(about 1/3 cup chopped candied ginger)
1 lb. milk chocolate
6 oz. toasted pecan halves

Line an 8-inch square pan with aluminum foil or parchment. Using a pair of kitchen shears, cut the marshmallows into quarters. Do the same with the dates; cut the apricots into strips. Melt the chocolate very carefully, either in a double boiler on the stove or in 20-second intervals in the microwave. Milk chocolate burns easily! Pour about 1/3 of the chocolate into the foil-lined pan and spread it to make a thin layer. Lay the marshmallows on top of that, then the dates, apricots, ginger, and 2/3 the pecans. Now carefully pour the remaining chocolate on top, trying to let it seep between the fruit and nuts. It may not cover everything perfectly. Working quickly before the chocolate hardens, arrange the remaining pecan halves over top. Maida says to refrigerate this, but it hardened nicely on my kitchen countertop. After it's had some time to sit and become firm, remove it from the pan and peel off the foil. With a large, sharp knife, cut the candy into squares. Store in Tupperware or wrap individually or put on a tray and cover with plastic. Tell yourself it's health food because of all the fruits and nuts.

Tuesday, October 19, 2010

Frozen Peanut Butter Pie

Since I made fruit desserts all summer, I now find myself faced with having to catch up on rich, chocolate-y desserts in the book. Each of the four desserts in this cycle (Alicia designed a pattern for us to get through the book without too much repetition) involves chocolate. Lots of chocolate. Even the pie entry this time around involves chocolate. Don't get me wrong: I love chocolate. I eat it every day. My map of Paris is covered with dots that represent chocolate shops. Still.

When I saw "Frozen Peanut Butter Pie," I immediately thought, "I need some kids to feed this to. No self-respecting French adult is going to eat this!" So I encouraged Julia to invite some friends over. She found that somewhat irritating, but agreed in the end.

The crust was the best part, I thought. I had to improvise because I didn't have enough "chocolate wafers". Galettes Bretons worked very nicely as a stand-in.

Now on to the dramatic part of the recipe: I decided to finally pull the Kitchenaid out and use it. I've been fretting about this for at least a month: can my beloved and precious mixer handle European power, even with the giant transformer that now sits under my kitchen counter? I've had anxiety dreams of strangers coming over to bake, turning on the mixer, and having it explode in a puff of smoke. Let me just say that this happened to my Mac in Germany once. It was not pretty.
So I turned the mixer on with the cream cheese and peanut butter. So far, so good. Then "pop!" Big spark. Maria in meltdown mode.
Fortunately, Sami was home. I was not about to turn that mixer on for the first time without backup! So I took a deep breath and asked him to please come take a look. Long story short--my husband is a genius and my mixer is fully functional. Some nuts (not the edible kind) had come loose and caused a short. Whew. I can make cheesecake next week!

So back to the pie. Julia had gone to a party involving waffles last week and had bought two cans of whipped cream for it, which got sent right back home with her. So I decided that since I was serving this pie to the girls who loved this whipped cream, I could just use it (an entire can!) instead of trying to whip French cream, which has been rather a chore in the past (French liquid cream has 30% fat instead of the 40% you get in the states). I cut out the powdered sugar in the recipe to compensate for the sweetness of the ready-made cream.

So here's the pie--just a sliver! It's very rich and very sweet, with really just a hint of peanut butter flavor. The 6 girls barely got through half of it. Julia's friends seemed to really like it, but Julia herself said it wasn't her favorite. It's been sitting in the freezer feeling lonely, I must say.

So here's the recipe. Find some hungry teenagers to serve it to!

Frozen Peanut Butter Pie

6 oz. chocolate wafers (use the Nabisco kind if you can find them; Oreos usually work as well. I used some "Sablés au chocolat," which were very nice)
1/4 c. (1 oz.) salted peanuts
6 T. (3 oz.) butter, melted

Heat the oven to 350. Line a 9-inch pie plate with foil. Put your cookies and peanuts in the food processor and pulse until you have fine crumbs. Pour in the butter and pulse that until you have a homogenous mixture. Press the crumbs into the pie plate, going as far up the sides as you can (I couldn't get mine to go very far up). Bake for 7 minutes and let cool. [By the way, this is an excellent time to get your 8-oz. block of cream cheese out of the fridge to come to room temperature.] Put the crust in the freezer for at least 4 hours. Then grab the foil and pull the crust out of the pan. Carefully peel the foil off the crust and return the crust to the pan. Believe me, you'll be happy you did all this when it comes to cutting the pie. Return the crust to the freezer and make the filling.

8 oz. milk chocolate (I used 6 oz. milk and 2 oz. dark)
8 oz. cream cheese, room temperature
1/2 c. (4.6 oz.) smooth peanut butter
3/4 c. (6 oz.) milk
1 c. (3.5 oz.) sifted powdered sugar
1 c. whipping cream

Break up the chocolate and melt it very carefully on very low heat on the stove or by 20-second intervals in the microwave. In your (fully functional) mixer, beat the cream cheese and peanut butter until very smooth. Add the chocolate and beat until that is smooth. On low speed gradually beat in the milk, scraping the sides of the bowl as necessary. Add the sugar and then take the bowl off the mixer. In another bowl, whip the cream until it holds a shape. Fold the whipped cream into the chocolate mixture. Now pour the mixture on top of the frozen crust. If it doesn't fit, put what does fit in the freezer and let it settle for about 10 minutes before adding more. Repeat if necessary (mine fit). Freeze until firm (probably at least 4 hours); cover with plastic wrap. Let sit in the refrigerator or even out on the counter for about 10-15 minutes before serving--it makes the pie a lot easier to serve and eat. Enjoy with a sweet tooth.

Sunday, October 17, 2010

Hershey's Brownies

Like Alicia, I'm always happy when I make it back to the brownie section of American Desserts. Maida has a knack for spot-on brownie recipes, and there's just no occasion that brownies don't improve. This weekend there were two brownie occasions: most of them got shipped off to Julia's soccer game as a much-appreciated soccer snack.
But while Julia was playing soccer, I had sneaked off to Paris to see a talk by Clotilde Dusoulier, of Chocolate and Zucchini fame. She gave a really nice talk (more like an interview, really) about how she started cooking and blogging and about the world of food blogging. It was interesting to hear her very positive take on American (Californian) food and the "Anglo-Saxon" way of writing about food. She and the moderator agreed that French people take food rather for granted and so do not have the same breathless sense of culinary discovery that we Anglos do.
Why do I mention Clotilde's talk here? Well, in true Maida Heatter fashion, I brought her a couple of these brownies, carefully wrapped in plastic (since I have no cellophane at home). The girls and I agreed that this was rather a stalkerish thing to do, but she seemed to be rather touched at the gesture. I hope she enjoyed them--I know I loved the one brownie I got to taste!

So, on to the brownies. This is a cocoa brownie with a triple-chocolate glaze. I suppose it's possible to make it with Hershey's chocolate, but why? I used a combination of French and American ingredients, as you may be able to see from the lineup here.

Lots and lots of walnuts! If you go the full weight in Maida's recipes, you end up with a very nutty product. Which is fine with me.

The finished brownie part. For once in my life, I didn't overbake these. They had the perfect texture, I thought.

Now for the glaze. I had to use up this Ghirardelli chocolate that had spent three weeks in a container, most likely in a constantly molten state. It really looked awful and was crumbly to boot.

But in the end, it melted up nice and smooth. Maida has the very intelligent idea here of melting the chocolate in stages: first the dark and then the milk. I took this a bit further and gave the block of unyielding unsweetened chocolate a zap (with the butter) before adding the semisweet, and the milk chocolate at the end. I think that helped the chocolate come together without danger of burning.

It's a nice layer of glaze: thick but not too overpowering.

And there's the finished product, ready for the soccer game.

I really liked these brownies: the cake was tender; the glaze was chocolatey and sweet, but not too sweet. I might just make them again sometime, so that I can eat more than one!

Here's the recipe. Share a few with someone you admire.

Hershey's Brownies

1/2 c. (4 oz.) butter
1/3 c. (1 oz.) cocoa powder
1/4 t. baking powder
1/4 t. salt
1 scant cup (6.5 oz.) sugar
1 t. vanilla
2 large eggs
1/2 c. (2.5 oz.) unsifted flour
1 c. (4 oz.) walnut pieces

Heat the oven to 350; line a 9-inch square pan with aluminum foil and butter the foil. In a saucepan or in a microwave-safe bowl, melt the butter with the cocoa--in the microwave, this will take about a minute. Stir until smooth, then add the baking powder and salt. Stir in the sugar, the vanilla, the eggs one at a time, the flour, and finally the walnut pieces. Pour into the prepared pan (asking yourself once again why people actually buy brownie mix) and bake 20-25 minutes (mine were done after about 15), until a toothpick comes out just barely clean. Let cool for 15 minutes, then unmold onto a rack and peel off the foil. Let stand until cool, and then make the glaze:

1/4 c. (2 oz.) butter
1 oz. unsweetened chocolate
3.5 oz. semisweet chocolate
4 oz. milk chocolate
1/2 t. vanilla

In a saucepan over low heat, or in a microwave-safe bowl, melt the butter and unsweetened chocolate until the chocolate begins to melt (about 30 seconds in the microwave). Add the semisweet chocolate and let that melt down just about completely (another 30 seconds). Finally, add the milk chocolate. If you're working on the stove, you can take the pan off the stove and stir until the chocolate is melted. If you're using the microwave, give it another 30 seconds and then stir. Add the vanilla. Maida recommends now beating the mixture with an electric mixer at high speed for a minute for better texture. I didn't, and mine was fine. Pour the glaze over the cake and spread it to cover. Let stand until set enough to cut. Enjoy the chocolate rush.

Sunday, October 10, 2010

Savannah Crisps

All this week I wanted to bake. I had this recipe in mind, and also a plum-apple pie thing that Deb posted this week. But stuff kept happening: a parent-teacher meeting here, a drink with colleagues with work there, one family member or the other off doing important stuff like teaching classes or participating in Model UN...well, it seemed I had barely time and opportunity to cook, much less bake.

But I had all the ingredients. I was ready. And so yesterday, I finally seized the opportunity. (Note: see that box of pearl sugar? I bought it in Sweden more than a year ago. It's been schlepped from Sweden to Hattiesburg and back to Le Pecq. And it finally got opened yesterday. I knew I was going to need it!)

This is a really simple and unusual cookie dough. It's not very sweet, it comes together in a food processor, and it's really thin and crisp.

About a minute later, here's the finished dough.

It gets rolled into a log.

And the log gets cut into 20 more or less equal pieces... (I had to leave home for about an hour at this point to take Julia somewhere. It was OK--the cookies still turned out great. You have to love that in a recipe.)

...which are then rolled out as thinly as possible--I could clearly see the printing on the rolling mat underneath. And sprinkled with precious pearl sugar.

Then they are baked until they are golden brown and delicious. They really are delicious. They're buttery and crisp--Claire says they're like puff pastry. Maida says, and she's right, that they stay crisp for a long time. So we enjoyed them, broken into pieces, as a snack. When I came home from the morning's marketing this morning, I caught Claire with one covered with whipped cream. But I was still obsessed with Deb's pie, and I had plums and apples.

So I made this for Sunday dessert. It was delicious, even though we could barely finish it. So, you have a giant cookie, then some plum applesauce (cut up some apples, add some water, sugar, cinnamon, maybe a bit of vanilla, cook over medium heat for about 10 minutes, add equal amount of halved prune plums, cook another 10 minutes or so), and then some of that Governor's Crème Fraîche, which has become something of an obsession.

Here's the recipe for the cookies. Get creative with them, or just enjoy nibbling on the crunchy goodness.

Savannah Crisps

2-3/4 c. (13.75 oz.) unsifted flour
1/4 c. (1.75 oz.) sugar
1/2 t. salt
1/2 t. baking soda
1/2 c. (4 oz.--1 stick) butter, cold and cut into dice
8 oz. plain yogurt
Crystal or pearl or raw or plain old granulated sugar

Heat the oven to 350; line as many cookie sheets as you can with parchment. Put the flour, sugar, salt, and baking soda in your food processor (you can also do this in a bowl and pastry blender--it's really like making pie pastry). Pulse a couple of times to mix. Then add the butter and pulse until the mixture resembles coarse crumbs. Add the yogurt and process until the mixture barely holds together. Turn the dough out of the machine onto a lightly floured surface and knead it until it holds together. (About the lightly floured surface: I found I needed to re-flour quite often because the dough tends to stick. Keep a little cup or pile of flour handy.) Roll the dough into a 10-inch log. Then cut the log in half lengthwise, and cut each half into 10 pieces. Now, get ready to roll: Roll each piece as thin as you possibly can: Maida says you should get 7-inch rounds. They don't have to be perfect circles, by the way, and I only got up to about 6 inches. Put 3 or 4 on each parchment-lined cookie sheet and sprinkle them lightly with whatever sugar you've chosen. Press the sugar in lightly. Bake the cookies for 10-15 minutes, depending on how hot your oven gets and whether you have convection. I have a convection oven and I could do two sheets at once in about 10 minutes. If you don't have a convection oven, switch the position of the cookie sheets after about 5 minutes. Let cool and then get creative.

Saturday, October 9, 2010

Apple "Cranberry" Muffins

Ah, Saturday breakfast! I know I harp on this all the time, but it really has become an important ritual in our household. Case in point: last weekend, Julia had the opportunity to spend the night at her friend's house. However, before she made the final decision, she called me to find out what was for breakfast. When I assured her I'd save her some muffins, she decided it would be OK to spend the night after all.

So, on to the muffins. The recipe calls for cranberries, and that had worried me. You can get cranberries around here sometimes, but only at the giant supermarkets and for limited times (and high prices). I had thought I'd wait to make these muffins until I could find cranberries, and then I noticed the red currants at the farmer's market. Perfect! They're round, tart, seedy--very cranberry-like.

The technique in this muffin is a bit different from normal muffin recipes--instead of melting the butter and mixing it in the batter, you cut it in with a pastry blender. This gave a tender muffin.

As you see, this is a muffin with a lot of "stuff"--currants, apples, nuts, raisins--and not that much batter to hold it together. I was a bit concerned, but again, it worked.

Here is a muffin, ready to eat. You'll see all the chunks of goodness inside. I really liked them--they were moist and fruity and just sweet enough. The currants were a really nice, tart counterpoint. They made our Saturday morning special once again.
Here's the recipe--make your Saturday special.

Apple Cranberry Muffins

1 egg
grated rind of 1 orange
1/3 c. (2.7 oz.) orange juice (for me, this was more than the juice of that one orange)
1 t. vanilla
1/2 c. (2.5 oz.) raisins
1/2 c. (2.2 oz.) sifted whole wheat flour
1/2 c. (2 oz.) sifted flour
1 t. baking powder
1/4 t. baking soda
3/4 t. cinnamon
3/4 t. nutmeg
1/4 t. ginger
1/4 t. allspice
1/4 t. salt
1/2 c. (3.5 oz.) sugar
1/4 c. (2 oz; 1/2 stick) butter, cold
1-1/4 c. raw cranberries or red currants, washed and dried
1 tart apple, peeled and diced fine
1 c. (4 oz.) chopped walnuts (I used sliced almonds, but walnuts would have been better)
Sugar (raw sugar is nice here)

Heat the oven to 350 and line 12 muffin tins. Mix together the egg, orange peel and juice, vanilla, and raisins. Sift the flours, baking powder, baking soda, cinnamon, nutmeg, ginger, allspice, salt, and sugar into a large bowl. Add the butter and cut in with a pastry blender. Add the orange juice mixture and stir just until blended. Now add the fruit and nuts and mix that. Scoop the chunky mixture into the muffin cups and sprinkle each muffin with a bit of sugar. Bake for 25-28 minutes (check these after 20 minutes) or until they are just firm to touch. Enjoy fresh from the oven.

Sunday, October 3, 2010

Kansas City Chocolate...Dream?

Before I get to the cake, I have a few more kitchen photos to share. Note that the kitchen is still rather a mess. This is partially due to moving, partially due to this being an "active" kitchen, and mostly due to my being, as my father so charmingly puts it, "one in a long line of bad housekeepers." Oh, well.

So you'll notice the fabulous cabinet Sami built (with the help of a certain Swedish superstore) to go over the island. I haven't optimized storage in the place yet, but it's better.

Another shot of the whole kitchen as it now looks. In about a week, I hope there will be a dishwasher under one of these cabinets! But right now there's a giant transformer under the cabinet that runs my appliances. The Cuisinart passed the test. Haven't hauled out the Kitchenaid just yet...

And another shot of my poor cookbook. I'm not sure it's going to make it out of this experience alive.

OK, on to the recipe, which we could subtitle "Kansas City Chocolate Nightmare, or Maida's Chocolate Cakes Kick Maria's Butt Once Again". (In other words, Alicia is going to love this recipe.) This is another "novelty" recipe--"Hey, cake with sauerkraut! What the hey?" "They used to make soggy pie with molasses--why not now?" and now "This fad of baking a weird liquidy cake so that it comes out with frosting on the bottom swept the nation--must be good, right?"

Let me back up and say that I took a huge risk on this recipe: I doubled it to bring to the two American Section cocktail parties we were invited to Friday night. Last year, I brought Barron's Brownies to such a gathering, and they were a huge hit. What could go wrong?

Lots of chocolate in cocoa form, but not much butter or other fat. Also, lots of water. And sugar. These are the syrup ingredients before the water went in.

You make a brownie-like batter, and then pour a hot mocha syrup over that. And then you bake it. Um, you might want to put something under that cake...

...because that syrup is going to boil over and make your kitchen/apartment smell dreadful.

And after all that, you have a rather funny-looking cake with spotty frosting. And you're going to get dressed up and bring that to some millionaire's house (actually, two separate millionaires' houses) without batting an eyelash.

I got up the courage to try this once I could build up plausible deniability. It was OK, but to me it tasted flat. It has the right texture (chewy cake and gooey frosting), but I found the frosting tasted more of flour than of chocolate. To summarize, there's not enough FAT in this cake. I found a Cook's Country recipe (from the February 2007 issue; you have to pay to see the recipe online) with twice the amount of butter, an egg yolk, and a half cup of chocolate chips. That would most likely taste better.

But here's the recipe. Don't expect to make your reputation as a baker with it.

Kansas City Chocolate Dream

1 c. (4 oz.) sifted flour
2 t. baking powder
1/4 t. salt
2 T. (0.4 oz.) cocoa powder
2/3 c. (4.5 oz.) sugar
3/4 c. (6 oz.) milk--I recommend whole milk here
1 t. vanilla
2 T. (1 oz.) melted butter
1/2 c. (2 oz.) chopped walnuts

Heat the oven to 350. Butter an 8-inch square pan. Consider putting it on a foil-lined baking sheet--just saying. Sift the flour, baking powder, salt, cocoa powder, and sugar into a mixing bowl (I recommend actually sifting here because both cocoa powder and baking powder tend to make unappetizing lumps). Add the milk, vanilla, and melted butter and beat, by hand or with a mixer, until light and smooth. Stir in the walnuts and then turn into the prepared pan. Don't put it in the oven yet--make the syrup first:

1/3 c. (2.3 oz.) sugar
6 T. (1.1 oz.) cocoa powder
1/2 c. (3.5 oz.) brown sugar
2 t. instant coffee or espresso
1 c. water

Put all of these in a saucepan and bring them to a boil, whisking to dissolve the sugars and cocoa. No reason you couldn't also do this in a large Pyrex container in the microwave. While this is still boiling, carefully pour it over the cake batter. You'll have a nasty-looking mess. Carefully put that in the oven (preferably on a foil-lined cookie sheet) and bake for 40 minutes (although my kitchen was smoking and the cake was very done after just 25--and yes, I have an oven thermometer that read exactly 350) until a toothpick comes out clean. Let cool in the pan. Then put a plate on top of the cake pan and flip it upside down. The cake won't come out, and you'll tap on the pan a whole bunch. Finally, you'll use a rubber scraper to dislodge the cake and frosting. Do your best to swirl the frosting around and make this pretty. Serve anonymously.


Saturday, October 2, 2010

The Governor's Crème Fraîche

Ah, the sauce category. So far, it's been odd mixtures of dairy, often very much on the bland side. And at least one of the sauces was a giant PITA to make . So it was nice to see this recipe for the Governor's Crème Fraîche. I don't know who the governor is or what state he governed, but he (she?) has good taste in sauces.
I have to note that this is one "American Dessert" that is certainly much easier to make in France than in the United States. In fact, I skipped the recipe for making my own crème fraîche because it's so easy to find here, and so delicious. See below.

On your left, you have the "Crème Fraîche Legère" (20%) from the supermarket. I use it instead of sour cream. On the left, you have the real deal: crème fraîche from the fromager (cheese shop/stand) at the outdoor market. As the gentleman was scooping up my crème fraîche (can I just say what a pain that is to type?), I remarked in my best caveman French, "Mister, that crème fraîche resembles not at all that of the supermarket!" To which he replied, "You bet your boots, honey!" or something of that ilk. But it's true. This is the good stuff.

So now I'm about to add more good stuff to the good stuff. Not much to go wrong with--lightly sweetened, vanilla-scented, just a touch of nutmeg.

Mmmm. Bliss on a spoon. But really, it would be nice to have more than a spoon to eat this with. Since it's so rich and sweet, I decided to go with fruit.

That fruit turned out to be stewed plums--see the stewed peaches recipe; add a cinnamon stick. That was yummy. We still had some left and found that it was delightful on banana pancakes. There was still some left (because we like to go easy on the cream, strangely enough), so I made some applesauce and ate the last of it with that. Perfect.

I would make this again. I probably will, since I have that delicious stuff within relatively easy reach. If you're in the States, you can make your own crème fraîche, or you can buy it--Costco usually has family-sized tubs.

Here's the recipe. Try to enjoy it in moderation.

The Governor's Crème Fraîche

1 c. (8 0z.) crème fraîche
3 T. brown sugar
1/2 t. vanilla
Pinch freshly grated nutmeg

Mix together. Eat right away or let chill. Serve with something fruity and delicious.