Monday, April 26, 2010

Old-Fashioned Coconut Cake and random thoughts

Motive and opportunity. These words come up in murder mysteries quite often, but they can also be applied to the baking blog enterprise. Why keep baking and blogging? I'm sure there are better uses for my time and my waistline. And yet, here I am with cookie dough in the freezer and a cake to write about.
Motive: I love to bake. I love making people happy with baked goods. And I even love tasting my creations. Sure, there's an award-winning bakery right down the street. Sure, that 10 pounds I've been wanting to lose since the late 80s isn't going anywhere. But for me, the process and the product are both worth it. Add to that the desire to prove to my sister that I can keep this up, and you've got pretty strong motivation.
Opportunity: This I have in spades right now. Not just the opportunity to bake, but the opportunity to share my baked goods. The second is really just as important as the first. With dozens of hungry students and weekly dinner parties, I could bake every day and not have to leave any dangerous temptation lying around the house. I'm going to miss that when the program ends in 2 weeks. At that point I'll probably have to send Claire to school with goodies. I'm sure I'll think of something. At some point I may feel too busy or, more likely, may lack the social network to foist my goodies on. But my hope is that very soon, some French people will be glad that they're my neighbor.
OK, enough rambling. On to the cake!

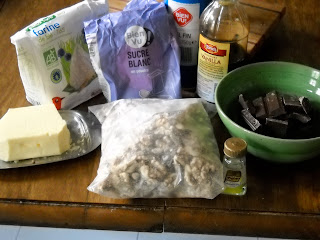
This is pretty much a pound cake with the addition of coconut and a bit of cocoa to make a dark top layer. Julia's comment when she saw the ingredient line-up: "Wow, that's a lot of butter!" My comment: "Wow, that's a lot of sugar!" 1 pound of powdered sugar! That's a lot. Even though I cut down the amount a bit, I still found it to be very sweet. Note also that I used coconut milk instead of most of the cream called for by the recipe. The recipe calls for coconut extract, which I couldn't find, so I thought that might add the necessary coconut flavor.

Instead of the bread crumbs called for in the recipe, I used coconut. It's mostly unsweetened and powdery here in France, so it worked well for this application.

Here's the very small chocolate layer. Maida was right in that "you will wish for more." Which begs the question why there isn't a bigger chocolate layer. The cocoa cuts the sweetness substantially.

And here's the sweet coconut layer. Did I mention that it's very sweet?
No pictures of the finished cake--I'm shy about doing food photography when guests are around. I really liked the moistness and texture of the cake. I wonder whether the sugar could be cut more without sacrificing texture. Many others who ate the cake (at least those who don't object to coconut) loved it. Julia was one of them: I wasn't sure that was the case when I saw her practically force cake on party guests, but she assured me that was her way of resisting temptation. She's learned well...

Here's the recipe. Make it for a large group of people with a pronounced sweet tooth.

Old-Fashioned Coconut Cake

8 oz. (2 sticks) butter
1 t. baking powder
1/4 t. salt
1 T. vanilla
1 t. coconut extract (I didn't use it and I see no reason to go out and buy it if you don't have it)
1/4 t. almond extract
3 cups (14 oz.) powdered sugar
4 large eggs
1-1/4 c. (5 oz.) sifted flour
1-1/4 c. (4.4 oz.) sifted cake flour
1 c. cream or coconut milk or a combination of the two
2 T. cocoa powder
1 c. (3.5 oz) coconut (unsweetened is much to be preferred here)

Heat the oven to 350. Butter a Bundt pan and coat it with dry bread crumbs or powdered unsweetened coconut.
Cream the butter with the baking powder and salt. Add the flavor extracts (be careful with the almond extract--a little goes a long way!) and then gradually beat in the sugar; beat for about 3 minutes. Add the eggs one at a time and beat a good minute after each one. On low speed beat in the flours in three additions alternating with the cream/coconut milk in two additions. Scoop out about a cup of batter into a small bowl and stir in the cocoa powder. Drop spoonsful into the prepared pan and smooth the batter out into a rather thin layer. Then mix the coconut into the white cake batter and spread that on top. Use a spoon to create a bit of a trench in the middle of the batter so that it will rise more evenly.
Bake for 1 hour 25 minutes (check after an hour) or until a cake tester comes out clean. Let the cake cool in the pan for 15-20 minutes, then unmold. Serve at room temperature. Maida suggests waiting several hours after the cake is cool to serve it, but the cake didn't suffer from being served slightly warm, I found.

Sunday, April 25, 2010

Brownie Truffles

Julia is here in Pontlevoy visiting for her 2-week spring vacation. Early on I showed her the next five recipes planned for the blog and asked her which one(s) she wanted me to make while she was here. "The Brownie Truffles. Definitely."
There's some more good stuff coming up for sure, but she was so right about this recipe. It's rich but not too sweet and combines fruit and nuts and chocolate very nicely. It left me wondering why I hadn't made these before.

The recipe begins with a brownie, but not just any brownie. This is a brownie stuffed with booze-soaked dried apricots. What's not to like?
Alicia and I grew up with dried apricots--our maternal grandparents had a large backyard with many fruit trees, most of them apricots. The Blenheims--the good kind. So every summer we would trek out to my grandparent's house about once a week and "cut cots." We would sit in what my grandmother called "the outie," a kind of glorified tool shed/gazebo, all around a big table, and we would cut buckets and buckets of apricots in half and put them on trays for my grandfather to set up for drying. Of course there was a lot of snacking, and the less-than-perfect apricots would go into the "jam cots" or the "pie cots" bowls, but my grandparents still made a whole lot of dried apricots for us to take home and keep in the freezer. My mother would always make "Golden Nuggets," a Betty Crocker recipe for cookies with coconut and dried apricots, at Christmas. Yum. All of this to say that dried apricots are a taste of childhood for me.

If you look carefully, you'll see that there used to be brownie batter in this bowl. My helper got a bit carried away in the cleaning department. I don't blame her.

OK, here we are ready to dip the brownies. You see that we have many shapes and sizes. Maida says to cut the brownies into 16 squares, but we were a bit more dainty. Also Julia thought that truffles should be round, so she rolled some into balls.

The dipping process. We didn't have nearly enough walnuts, so we switched to sliced almonds. The walnuts were better, though the almonds were OK.

Mmmm...truffles. And my hand, coated in chocolate nutty goodness. That was a delightful clean-up task.
We loved these a lot. So much so that we forced ourselves to give them away to anyone who would take them. These would make a great holiday goodie, but why wait?

Here's the recipe.

Brownie Truffles

4 oz. dried apricots (get the Blenheim kind from Trader Joe's if you can)
3 T. Grand Marnier or Cointreau (I used Calvados because it's all I had; it was fine)
2 oz. unsweetened chocolate
4 oz. (1 stick) butter
Pinch salt
1 scant cup (6.5 oz.) sugar
2 large eggs
1/2 t. vanilla
1/4 c. (1.25 oz.) unsifted flour

Soak the apricots the night before: Use scissors to cut them into thin strips. Put them in a jar with a lid and pour on the booze. Let them sit, stirring and shaking when you think of it, overnight.
Now make the brownies. Heat the oven to 325. Line an 8-inch square pan with aluminum foil or parchment and butter that. Melt the chocolate and butter in a large microwave-safe bowl in the microwave for about a minute to a minute and a half, stirring after every 30 seconds. Stir in the salt, sugar, and the eggs, one at a time. Then stir in the vanilla and the flour. Finally, pour in every drop of the apricots and booze. Stir that and scrape into the prepared pan. Bake for about 25 minutes (Maida says 40-45, but really, check after 20), or until a toothpick comes out clean. Let cool to room temperature, then chill/freeze until firm.
When the brownies are nice and cold, get the coating ready:

1 lb. walnuts, chopped fine but not ground (really, you'll probably need most if not all of this)
1 lb. milk chocolate (I used a combination of milk and dark and probably somewhat shy of a pound. You don't need the full pound and a half Maida calls for, in my humble opinion.)
6 T. (3 oz.) Crisco or butter (I didn't use this. I imagine it makes the chocolate coating a bit thinner and easier to use. But we had no problems with pure chocolate.)

Get the brownies out and cut into 16 small or 32 tiny squares. Put them on a long sheet of waxed or parchment paper.
Put the walnuts in a pie plate or other wide, shallow bowl. Melt together the chocolate and Crisco in 30-second intervals in the microwave. Be careful because milk chocolate burns very easily.
Now find a helper, if possible, and make an assembly line: dip the brownies first in the chocolate, and then roll them in the nuts. We used a fork for dipping and hands for rolling. When all the brownies have been dipped/rolled and you've done your share of quality control, you'll probably want to put them in the freezer for a bit to firm up. This doesn't take more than half an hour. Then let them come to room temperature and serve. And then chase random people down in the street to offer them truffles because They Must Go.

Monday, April 12, 2010

Extra Chocolate Monsters

OK, the real name of this recipe is "Extra-Bittersweet Chocolate Chunk Monster Cookies." But to me, they're extra-chocolate monsters. They have too much chocolate (!) and are rather monstrous.
I have actually made this recipe before--I don't remember it, but I have cryptic notes written in: "wasn't thrilled, but others were--bake sale!" So I didn't like them and so I foisted them off to other people. Guess that's what will happen again. Fortunately, the students are back at the Abbey. The perfect victims for the perfect crime. Bwahahahaha!
Update: The students loved these: not a crumb left. So my notes from many years ago continue to be accurate...
OK, they're not THAT bad. They just don't provide that perfect balance of sweet, buttery chew against the chocolate. And Maida's favorite, almond extract, really seems out of place here.

Here's the dough. Note that there's barely enough to contain the large chunks of chocolate (Maida specifies for them to be no smaller than 1/2-inch squares).

The recipe said to make 8 cookies, but I'm a rebel and squeezed out 12. And I forgot to flatten them. Oops.

Here's the big issue I had with the cookies, besides the fact that they don't taste that great: the chocolate is not contained. That's a lot of wasted chocolate right there.
Verdict: I would stick to a classic chocolate chip cookie. These cookies are getting a lot of press right now (check out David's version for a laugh). These also look like a good giant cookie, although they go in a different direction.
But if you must, here's the recipe. Buy your chocolate on sale!

4 oz. (1 stick) butter
3/4 t. vanilla
1/4 t. almond extract (consider omitting this)
1/2 t. salt
1/3 c. (2.3 oz.) sugar
1 c. (4 oz.) sifted flour
9 oz. bittersweet or semisweet chocolate, in large chunks
4 oz. walnuts, in large pieces

Heat the oven to 350. Line three cookie sheets with parchment or get three sheets of parchment ready. Cream the butter until soft, then add the vanilla, almond, and salt. Then gradually add the sugar and beat that a minute or two. Finally, beat in the flour at low speed. Take the bowl from the mixer and stir in the chocolate and nuts. It will take some stirring to get this more or less incorporated. Divide the dough into 12 equal pieces, and roll each piece into a ball. Having wet hands helps with this step. Put the balls on the parchment paper, 4 to a sheet, and use your wet hands to flatten them out a bit. Bake the cookies for 15-17 minutes, until they're still light on top but brown around the edges. Carefully transfer to racks to cool. Find some willing victims to eat your cookies once you've had yours.

Sunday, April 11, 2010

Raisin Banana Cupcakes

Ah, another Saturday morning, another Maida Heatter breakfast treat! Despite the name cupcakes, these are real muffins, with more banana than anything else. But sadly for Alicia and Claire and all the other raisin-haters, these do have raisins.

So here's the line-up. As you can see from my bananas, it was definitely time to make these muffins! But someone ate the third banana I was saving, so I had to carefully cut the recipe in half (because I ended up with half of the given weight of bananas). I always hate it when I have to do half an egg, but it worked out OK.

Here they are, all baked up. The half recipe only made 6 giant muffins, which disappeared very quickly, even though Claire only took a few bites, objecting to the raisins. Julia claimed this time to not object to raisins per se, but said that they didn't contribute to this recipe. We agreed that the same amount of walnuts would probably be better.
So the verdict? Meh. These were fine, but they probably won't become my go-to banana muffin recipe. But here's the recipe so that you can make your own judgement:

Raisin Banana Cupcakes

3.5 oz. light raisins or walnuts
1 c. (4 oz.) sifted flour (I used about half whole wheat)
3/4 t. baking powder
3/4 t. baking soda
1/4 t. salt
1/4 t. nutmeg
1/4 t. cinnamon
3 large (12 oz., peeled) bananas, mashed
1 large egg
1/3 c. (2.3 oz.) dark brown sugar
1/4 c. (2 oz.) vegetable oil (I used melted butter; some nut oil might be nice here)

Heat the oven to 375; line or spray about 20 muffin cups. Put the raisins in a heatproof bowl or cup and cover them with boiling water. (Or toast the walnuts) Let them sit while you put the muffins together. In a large bowl, whisk together the flour, baking powder, baking soda, salt, nutmeg, and cinnamon. In a smaller bowl, whisk together the bananas, egg, sugar, and oil. Mix the wet ingredients into the dry ingredients. Drain the raisins and add them (or the walnuts) as well. Spoon/pour the mixture (like Maida's other muffin recipes, this is pretty liquidy) into the prepared muffin cups and bake for about 25 minutes (check after 20) or until the top springs back when gently pressed. Pour yourself a cup of coffee and enjoy the beginning of your day.

Friday, April 2, 2010

White Custard Cream, or Patience is a Virtue

I made this cream to go with the apple and orange cobbler from the last post. Such a simple recipe, and yet it involved a broken dish, intervention from Sami, and being 30 minutes late for our dinner party. The problem was all about patience.
(not pictured: sugar. Also, note the fresh-from-the-chicken eggs) This custard cream is like a crème anglaise but made with egg whites. I had never seen anything like that before and worried that it would curdle as soon as you looked at it. So I got it up to about 135 degrees when Maida said 170, but then it seemed to be curdling, so I took it off the double boiler, strained it into another bowl, crossed my fingers, and put it into the fridge.

About half an hour before we were supposed to leave, I asked Sami to check on the cream--it looked weird to me. "This is too thin," he said. And so we put the bowl back over the pot of simmering water.
Unfortunately, the bowl we were using was not tempered glass and cracked noisily after about 5 minutes. Due to Sami's cool head, we were able to rescue most of the cream (but not the bowl--we owe our landlords a glass bowl) and strained it into a genuine Pyrex bowl. Then Sami stood there and stirred. And stirred. And patiently stirred.

I swear it took at least 40 minutes for the cream to reach this stage. And we even added a bit of cornstarch slurry just in case. But it did whip up into a thick cream, and it eventually reached that target temperature of 171.
This shows me that I've been making undercooked crème anglaise for years. Rose Levy Berenbaum always has you take the custard off the heat when it starts steaming: this started steaming at about 135 or so. But really it needs more time and temperature to thicken properly. And above all, it requires patience, which I don't always have.
So now many things occur to me: Perhaps you could make a sauce like this on the stovetop if you kept the heat low and stirred like crazy. And perhaps you could make custard sauce with whole eggs: if you can make it with just whites and just yolks, why not both?
But it all boils down to this: I need to plan for a good 45 minutes at the stove to make a good custard sauce. Which I will need to do more often now, since French (industrial) ice cream doesn't do it for me...

Here's the recipe. Put on some music or a podcast or your favorite TV show and prepare to stand at the stove.

White Custard Cream

2 c. cream
2 T. sugar
4 large egg whites
1 t. vanilla
a few drops almond extract

Put a few inches of water in a saucepan that your HEATPROOF mixing bowl will fit over, and put that over medium heat to get the water simmering. You'll also need another bowl or pitcher with a strainer over it. Microwave 1 cup of the cream for about 1 minute to 1-1/2 minutes until it is steaming but not boiling. Add the sugar and stir to dissolve. In a HEATPROOF mixing bowl, whisk the egg whites and the remaining cold cream until the whites are no longer gooey and the mixture seems uniformly liquid. Whisk the hot cream mixture in gradually, then put the bowl over the simmering water in the saucepan and stand around stirring and scraping the mixture until it reaches 171 on a candy thermometer. Maida says that takes 5-6 minutes. Things must heat faster in Florida. Once you've reached the magic temperature and the custard has started to thicken nicely, pour it through the strainer into the bowl or pitcher you've gotten ready. Now add the vanilla and almond. Maida makes the very good suggestion of first pouring a few drops of almond into a spoon and then pouring it into the custard so that you don't accidentally make Almond Medicine Cream. Let the cream cool down at room temperature, and then cool it. Serve this with fresh fruit or with cobbler or anything that calls out for something white and creamy.

Apple and Orange Cobbler

Anyone who reads this blog must think we spend all our time either giving or going to dinner parties. And maybe they're right: we do feed and get fed a lot. Since I'm not naturally outgoing but enjoy feeding people, dinner parties are a chance for me to socialize in a comfortable atmosphere. And it helps me move my blog desserts out the door!
This week's dessert was no exception: we were invited to a sort of potluck dinner at the home of a French-American couple here in town. So there were two Franco-American families, an expat Brit with her daughter and parents, and a French family who had moved here from, as I understand it, North Africa. Very international--just like our dinner parties in Mississippi! Many lame attempts by us Anglophones to communicate in French; many lame attempts by the Francophones to speak English. And yet we all had a great time.
Our hostess, Pamela, tried very hard to communicate what dish everyone should bring, but in the end, it seemed that everyone brought a dessert. There was coconut flan and chocolate mousse and this cobbler (with the custard sauce recipe that will follow) and some cupcakes that I made because I was worried the cobbler wouldn't be enough for 13 people. All these desserts came after snacks, a starter, a main course, cheese, salad, and many bottles of wine. I think we were all in pain afterwards. But everything was so good!

So, to the cobbler. Again, I had reservations about this one. I'm not necessarily a fan of cooking oranges. That seemed strange to me. And I was a bit nervous that in the headnotes, Maida just reminisced about buying Pepperidge Farm bread rather than raving about the recipe itself. Still I plowed on.

One major change I made to the recipe was to thicken it with tapioca instead of making a roux. That was because I began making the cobbler at about 6:15 and the party was at 7. I also saved myself a bunch of extra dishes that way. And I like the gooey way tapioca thickens a fruit filling.

Also in the interest of time, I did not bother to roll out and cut biscuits for the topping. As I did for the cherry cobbler, I just dropped them on. They looked fine and tasted great.
The verdict? Delicious!! It's hard to go up against coconut flan and chocolate mousse, but everyone seemed to love the dessert. It was unfamiliar to the French because it's not a classic "crumble" (crisp), but they liked it because it wasn't too sweet (a miracle for a Maida dessert) and it didn't have any cinnamon :-). But they asked me many times what flavoring I had used. Orange flower water? Cinnamon? I guess the orange zest was kind of a nice background flavor. And all the butter in the filling probably also helped. It was delicious with the custard cream, but I think just some vanilla ice cream would be delightful as well.

Here's the recipe as I made it. You can bring it to a potluck with pride, or just save it all for yourself.

Apple and Orange Cobbler

3 lbs. tart apples (I used Pink Lady; Maida recommends Granny Smith), peeled and sliced into about 12 slices per apple
Grated zest of 1 orange
1/2 c. orange juice
3 oz. (6 T. ) butter
3/4 c. (5.25 oz.) sugar
3 large oranges, cut into segments without membrane (if you really wanted to cheat, I bet you could used canned drained mandarin oranges)
about 1/4 c. minute tapioca
1/2 t. vanilla

Butter a wide, shallow 2-quart baking dish (mine was an oval gratin dish) and have it waiting around. In a large skillet with a cover, put the apples, orange juice and zest, butter, and sugar. Mix and then cook, covered, over medium heat until the apples are barely tender. Meanwhile, segment your oranges (check out this video to see how. My segments were not nearly as pretty) into a bowl and let the juice fall into it as well. Add the tapioca and vanilla and let that sit until the apples look ready. Once the apples are just tender, take them off the heat and stir in the orange/tapioca mixture. Spoon that into the baking dish and let it sit while you make the biscuits.

2 c. minus 2 T (7.5 oz.) sifted flour (I used some whole wheat)
1/4 t. salt
2 t. baking powder
3 oz. (6 T.) cold butter, cut into about 12 pieces
2/3 c. cold milk
Cream/milk
sugar/vanilla sugar/cinnamon sugar

Heat the oven to 450. Get out your food processor. Put the flour, salt, and baking powder into the bowl of the processor and give it a few pulses to mix. Then toss in the butter and pulse that until the butter pieces are no larger than small peas. Finally, add the milk and pulse until everything is just incorporated. With two small spoons, scoop out the dough from the processor and dot the dough all over the fruit. You'll see from my picture that the dough doesn't really cover the fruit, but that's OK. Now brush the biscuits with some cream or milk, and sprinkle them with about a tablespoon of sugar (I used vanilla sugar, but cinnamon sugar would be nice as well). Bake for about 15 minutes, or until the biscuits are nice and brown and the fruit mixture is bubbly. Serve this hot. I turned off the oven after the baking time and left the cobbler in for a couple of hours, and it was still very good--it was very warm and not dried out. It's also good microwaved the next day for breakfast.