Monday, January 30, 2012

Bow Ties

Sigh...it's not so great to come across a recipe like this when I'm almost at the end of the book. But here we are, one cookie recipe from the end, with a clunker like these Bow Ties.


 Why am I so down on these cookies? Well, here's Exhibit A: the ammonium carbonate (Hirschhornsalz) that I had to import at great expense from Germany (thank you, Amazon!). It made everything smell terrible--a public restroom is probably the best metaphor--and the off taste never went away, to my mind. At the same time, maybe the failure is all my fault: Maida wanted me to treat this just like baking powder, adding with the dry ingredients, but the package told me I should dissolve the carbonate in water, which I did. That might have contributed to the texture, which was not "airy, crisp...especially light", as Maida promises.


 Another factor that made me (rightfully) suspicious: oil instead of butter. This is perhaps in the interest of making the recipe kosher, since Maida says these were a speciality of Jewish bakeries. But I don't like the texture of oil-based baked goods. And the anise: normally I like it, but here it was awfully strong. Whine, whine.

Anyway, here's the recipe. If you happen to have some ammonium carbonate in the house (according to Wikipedia, you can also use it as smelling salts if anyone's feeling faint), give it a try--you may be luckier than I.

Bow Ties

1 t. anise seeds
2-1/2 c. (10 oz.) sifted flour
1/2 t. salt
1 t. powdered ammonium carbonate
2 T. sugar (plus extra for rolling the dough in)
4-5 large eggs
1/2 c. (4 oz.) tasteless oil (grape seed, canola)
1/2 t. vanilla
1/4 t. almond extract

Use a mortar and pestle or a spice/coffee grinder to grind the anise seeds. Whisk them together with the flour, salt, ammonium carbonate, and sugar and set aside.


 Break 3-4 eggs into a glass measuring cup and see how much you have. Separate another egg and add the yolk. If you need to, top up with some of the white. What you see here is 3 "medium" French eggs plus a yolk; I added a bit of white to it after the picture was taken.
Put the eggs in a mixing bowl, beat to mix a bit, then add the oil, vanilla, and almond extracts and beat again to mix. Gradually, on low speed, mix in about half the dry ingredients.


 Beat at high speed for 5 minutes. Maida says the mixture will crawl up the beaters, but mine just sat there, as you see. Maybe that indicates a problem. In any case, stir in the remaining dry ingredients, for a "thick, sticky, and gooey" dough.


 Flour a large piece of foil or parchment, pour out the dough onto the flour, then sprinkle the top with more flour. I was probably more generous than I needed to be. Let this sit for 30 minutes.

 When the 30 minutes is up, heat the oven to 350 and line two cookie sheets with parchment, foil, or silicon liners. Heavily sugar a surface (clean counter, pastry cloth...) and carefully transfer the dough to it, shaking off as much flour as possible. Sugar the top of the dough. Roll or pat the dough out to an oblong about 12x6. I found that patting was the best I could do--the dough had settled to just about that size anyway.


 Using a bench scraper or long, sharp knife (but be careful with knives and silicon!) cut the dough crosswise into 3/4-inch strips, and then cut each strip in half.


 Grab each strip with both hands and give it a few twists. It won't be easy because the dough will still be quite sticky. Place the twists on your lined cookie sheets--they can go fairly close together.


Bake for 25-30 minutes (check after 20), until just pale golden (looks like mine went a bit beyond the pale). Transfer the cookies to wire racks to cool, and then store air-tight. Hope for better luck next time.

Tuesday, January 24, 2012

Apple-Cranberry Pudding


I'm not sure why this dessert is called a "pudding" and put in the pudding section of Maida's book. To me, it's a cobbler pure and simple. But hey, who am I to complain? This section of the book has had its share of brilliant successes and dismal failures, so it was nice to end it with something everyone liked.


This is a great recipe for a midwinter, mid-week dessert. You start by digging a bag of precious cranberries out of the freezer and supplementing them with chopped apples, equally precious chopped pecans, and sugar.


Then you take 5 minutes to mix together some melted butter (I bet that if you took an extra 5 minutes to brown the butter, that would taste dynamite), eggs, sugar, and flour and pour that on top.


Finally, you give this concoction some time in the oven while you tend to dinner. By the time you've finished dinner, dessert is ready!


The cranberries put the dessert over into the tart side, even though the topping is as sweet and buttery as you could ask, so you'll want to serve this with something sweet and creamy: I chose sweetened crème fraîche, but vanilla ice cream would also be a very good choice.
According to the rest of my family, this also made a very good breakfast the next morning ("It's fruit! It's healthy!"). Maybe with a scoop of Greek yogurt to feel virtuous about the whole thing?

Here's the recipe.

Apple-Cranberry Pudding

1 bag (12 oz.) fresh or frozen cranberries
2 large cooking apples--Maida recommends Granny Smith or Jonathan. I used 4 small Elstar apples.
1/2 c. (2 oz.) chopped toasted pecans
1/2 c. (3/5 oz.) sugar--raw sugar might be a good choice here

Heat the oven to 325. Butter a shallow casserole or baking dish--Maida suggests an 11x8-inch dish if you have one. Rinse and pick over the cranberries. Peel, core, and cut the apples into chunks. Mix the cranberries, apples, pecans, and sugar in the casserole dish. Set aside while you make the topping.

3/4 c. (6 oz.) butter
1 c. (7 oz.) sugar
1/2 t. vanilla--not in the original recipe, but I like vanilla in batters like this
2 large eggs
1 c. (5 oz.) flour--I used about 2 oz. whole wheat pastry flour (110)

In a microwave-safe bowl, melt the butter (or melt/brown it in a small saucepan over medium heat). Add the sugar, then the vanilla, then the eggs one at a time, and finally the flour. It's like making blondies!
Spread this mixture over the cranberries and apples. Bake for 50 minutes, or until the top is golden and the  filling is bubbling at the edges. Serve warm with vanilla ice cream or your favorite sweet creamy topping. This should serve about 8.


Tuesday, January 17, 2012

Bonus recipe: All-American Brownies


As I finish up the last few recipes in the American Desserts book, I have found myself instead making Maida's All-American Brownies for successive parties. This recipe comes from her Book of Chocolate Desserts, my first dessert cookbook. I got a reputation from this book, making cakes and cookies and Coffee-Toffee Pie. But it's the All-American Brownies and the World's Best Hot Fudge Sauce that I always go back to.


The recipe for All-American Brownies is not so different from the one you might find on the back of the orange packet of unsweetened chocolate: melt chocolate and butter, add vanilla, sugar, eggs, flour, and nuts, bake. One bowl, 10 minutes max.


I also find that this recipe is one of my favorite reasons to have a microwave, though it also comes together quite nicely in a saucepan.

What else can I say? The recipe is simple and yet makes friends wherever you take it. I brought some to my friend Gabrielle's birthday party (thus the fancy presentation), and they were inhaled. "These are not brownies!" one guest proclaimed. "This is a fondant (that warm cake with the soft center)!" We discussed the recipe for a while, and it was determined that it was the proportion of butter that made it so good. Who knew that French people liked to skimp on butter? But of course it is all-American to go nuts with the butter...


In any case, you can't have a site about Maida Heatter's American desserts without this recipe. I read somewhere that American chocolate dessert recipes didn't go into the super-chocolatey realm until Maida Heatter's books came along. With that inspiration in mind, the recipe I present you is even more chocolate than the original, thanks to some additional cocoa and chocolate chips or pieces.

Here's the recipe. Make your friends happy.

Amped-up All-American Brownies

2 oz. unsweetened chocolate (100% chocolate), chopped
1/2 c. (4 oz.) butter
1 heaping tablespoon (0.5 oz.) unsweetened cocoa powder
Large pinch salt
1 t. vanilla
1 c. (7 oz.) sugar
2 eggs
1/2 c. (2 oz.) flour
1/2 c. (2 oz.) coarsely chopped walnuts
1/2 c. (3 oz.) chopped semisweet chocolate or chocolate chips

Preheat the oven to 350. Line an 8-inch square pan with parchment or foil; if you're using foil, butter or grease it. In a medium microwave-safe bowl (a 4-cup measure is perfect) put the chocolate, butter, cocoa, and salt. Microwave in 30-second bursts, stirring well after each, until the chocolate and butter are melted (you can also melt this together in a small heavy saucepan over low heat). Stir in the vanilla, then the sugar, then the eggs (one at a time, stirring well after each), then the flour, and finally the nuts and chocolate. Pour into the prepared pan and smooth the top. Bake for 15-20 minutes or until just barely set--I find these are best when they're still a bit gooey. Cool in the pan and cut into squares: it's probably easiest to cut them if they've been chilled or even frozen, but I think these taste best room temperature or even slightly warm. It's your call. Enjoy the brownies--and the praise.

Saturday, January 14, 2012

Kansas Cookies


It's January. The days are short and often gray, but I don't have classes to teach for a few weeks. Normally that would be a good thing (time to read! bake! go to Paris!), but I end up frittering away my time on the Web and/or working on what I'll be teaching next semester. 


Good thing I made a baking date for myself this week, giving me permission to spend time puttering around the kitchen. And this recipe is a splendid way to putter around.


 It seems like many or most of Maida's "other" cookies, at least towards the end, are the project kind. Last week I had the stack of eight layers, and this week I had the roll, fill, and cut recipe.


 It's an interesting recipe, one which, like so many of these recipes, I was skeptical of. Cinnamon-molasses dough around a lemon-coconut curd? Lots of flavors going on.


 But as with most of these recipes, I'm glad I soldiered on and tried it. There's a reason this recipe won a prize at the Kansas State Fair--they have a great moist, chewy texture, and the lemon flavor really takes over and shines. I don't think I've ever had a cookie quite like this one, and that's really kind of a shame.


They're not the prettiest cookies ever, but they're fun to make and delicious to eat. Here's the recipe with some process photos to make it easier to understand.

Kansas Cookies

1/2 c. (4 oz.) butter, room temperature
1/2 t. baking soda
1/4 t. salt
1 t. cinnamon (I used a bit less)
1 c. (7 oz.) sugar (I went down to 6.5 oz. and these were still quite sweet. 6 oz. is probably plenty)
1 large egg
1/4 c. (2.8 oz.) light molasses
2-1/4 c. (9 oz.) flour (I used about 3 oz. whole wheat)

Cream the butter with the baking soda, salt, and cinnamon. Add the sugar and beat a minute or two longer. Add the egg, beat until well incorporated, and then the molasses. Finally, stir in the flour. You'll end up with a sticky dough as you'll see in the unattractive picture near the top of the page. Scoop the dough out onto a long piece of waxed or parchment paper and form into a log about one foot long. Wrap and refrigerate at least 6 hours or overnight, or if you're impatient like me, freeze for about 15 minutes and then refrigerate for at least an hour. While the dough is chilling, make the lemon curd:

2 large eggs
1/2 c. (3.5 oz.) sugar
1/4 t. salt
Grated rind of 2 (organic) lemons
1/4 c. (2 oz.) lemon juice
1 c. (3.5 oz.) coconut--I used the very fine unsweetened stuff that seems to be standard here

In a small, heavy pot, whisk the eggs until well mixed. Gradually beat in the sugar and then the salt, lemon rind, and lemon juice. Put the coconut in a medium bowl and put a fine sieve over that bowl.
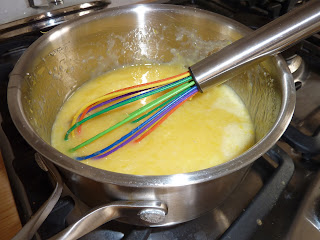
Place the pot with the lemon mixture over very low heat and cook, whisking and scraping the bottom and sides almost constantly, until the mixture thickens "to the consistency of a soft mayonnaise". This will take 5-10 minutes. Note: Before cooking, my mixture looked nasty and curdled, but it smoothed out nicely while cooking.
When the curd is cooked, pour it into the strainer above the coconut and use a rubber spatula to force most of the curd through, leaving behind any congealed egg and lemon rind (Maida doesn't include this step, but I like to strain my custards). Mix the curd well with the coconut--this will be a thick mixture--and set aside to cool and even chill. You can use this mixture room temperature or cold.
OK, now it's time to shape the cookies. Preheat the oven to 350. Have ready a floured surface, rolling pin, ruler, and probably a bench scraper. You'll also want some cookie sheets--Maida says unbuttered, but I used silicone liners.
Cut the log into four equal pieces (you could use the ruler to measure out 3-inch lengths). Take one for right now and put the rest back into the refrigerator.


 On your well-floured surface, roll the dough out into a 15-inch snake. It'll be pretty thin, as you see.


Carefully roll out the dough to make it wider (3 inches wide) but no longer. Use your bench scraper to make sure the dough isn't sticking to the surface.


Divide the lemon mixture into quarters. Use a small spoon to distribute a narrow strip of filling down the middle of the dough. (By the way, this is a lot like making the Apricot Strip.) Fold each side of the dough over the filling. It may meet, it may barely meet, it may even overlap a bit. It's all good.


 Now use your ruler to measure out 1-1/2-inch lengths of the dough. If you measured correctly, you should get 10 cookies per log of dough.


Place the cookies on your cookie sheets: Maida says 1-1/2 inches apart, but these don't spread much, so you can crowd them a bit more if you like. I baked 3 sheets for the 40 cookies.

Bake the cookies, two sheets at a time, for 15 minutes (check after 10). They'll be a bit darker around the edges, and any gaps on top will have filled in. The dough may crack on top if there isn't a gap.
When the cookies are baked, transfer to a rack to cool. They are at their best when they're warm (not hot) or at room temperature. They seem to keep well--we're on day 2 and they're still delicious. We'll see how many we have left over by tomorrow.

Sunday, January 8, 2012

Eight-Layer Cookies


So what did I do two weeks after I swore I never wanted to see another cookie again, ever? I baked cookies! And you know what? It was totally worth it!


Make no mistake: these cookies are a project. After reading the recipe, I took a look at my calendar and made sure I had a day I could be at home to make dough(s) and chill and roll out and chill and slice and bake. I'm pretty sure that the process could be spread out over days, but I wanted to get these done.


To elaborate: you make a yolk-rich, buttery cookie dough and flavor half with almond extract and the other half with cocoa powder and coffee. After the doughs have chilled for a while, you cut each square of dough into equal squares and roll them out. You put each layer on parchment/waxed paper and chill them.


Then you stack up the layers of dough and wonder if you shouldn't have rolled them out more carefully.


But you continue: you chill the stack and then slice and trim the long cookies.


And they're beautiful (although I suppose they could be straighter)! I don't think I've ever made a cookie that looks quite so fancy and professional. 
The best surprise with this cookie is how good it tastes. I had feared that even though making them was fun and satisfying, eating them wouldn't be that fabulous. But I was wrong: these have a great crisp texture and a really nice chocolate/almond flavor. Sami especially loved them and made them his breakfast a couple of mornings in a row. I don't think I actually ate more than four cookies before they were all gone.
Lessons learned: good cookies baked in January are still good cookies. Fancy layered cookies can taste terrific. Maida would not lead me astray. I'm looking forward to my next cookie-baking date.

Here's the recipe. Mark your calendar.

Eight-Layer Cookies

1 c. + 2 T. (9 oz.) butter, room temperature
1/2 t. baking powder
1/2 t. salt
1 t. vanilla
1 c. minus 2 T. (6.13 oz.) sugar
4 large egg yolks
2-1/4 c. (9 oz.) sifted flour
3/4 c. (3 oz.) unsifted cornstarch
1/2 t. almond extract
1/4 c. (0.75 oz.) unsweetened cocoa powder
1/2 t. instant espresso powder

Cream the butter with the baking powder, salt, and vanilla until light and fluffy. Beat in the sugar and beat another 2-3 minutes. Beat in the egg yolks, one at a time. Then stir in the flour and cornstarch by hand or at low speed. The dough will be quite thick. Remove half the dough to a medium-sized bowl. Add the almond extract to the dough remaining in your mixing bowl and beat until mixed. Scrape out onto a piece of waxed paper, shape into a 5-inch square (yes, I used a ruler this time), wrap it up and freeze it (or refrigerate it for 1 hour). Put the reserved dough half into the mixing bowl and add the cocoa powder and coffee powder to it. Beat it until the cocoa is incorporated and form this dough also into a 5-inch square and freeze it. After about 30 minutes, the dough should be firm enough to work with. 
You'll need a floured surface to roll out on, a rolling pin, a ruler, and plenty of waxed paper or parchment. Take one dough square and, using your ruler, cut it into four 2-1/2-inch squares. Slowly and carefully roll out each square into a 10x4-inch rectangle. The edges may crack and all, but you'll trim them later, so don't worry too much. Just try to get the rectangle as even as possible, and measure to make sure all the rectangles are about the same size. As each rectangle is rolled out, place it on its own sheet of waxed/parchment paper. You can stack them up.
When you've rolled out all the dough, put all eight layers in the freezer, preferably on a cookie sheet so that they stay flat. Let chill for 15-20 minutes, no more. Take them out of the freezer and then make your stack: start with a white layer and brush it with a bit of cold water. Put a black layer on top of that and press down a bit. Brush that with water and top with a white layer, pressing down. Continue. Wrap the whole stack well in plastic wrap and refrigerate several hours or freeze for about an hour.
OK, you're reaching the finish line. Preheat the oven to 375 and line two cookie sheets with parchment or silicon or aluminum foil. Take out and unwrap your dough stack. Trim one narrow end so that it's all even. Then use a ruler to mark out 1/4-inch slices. Use a big, sharp knife to carefully cut those slices. Trim the ends of each slice separately. You'll have a lot of dough scraps, which you can roll out later to make "marbleized cookies" or simply give to your cookie-dough-obsessed family members (if you're not afraid of raw eggs).
Place the slices carefully on the lined cookie sheets; they don't have to be spaced very far apart. Bake for 15-20 minutes, or until they're golden brown at the edges but still pale in the middle. It's tricky because you want them to bake long enough to be crunchy but not so long that you lose the contrast in color. Check every minute or so when you've gotten close to the 15-minute mark. Carefully transfer the cookies to a wire rack to cool. Feel proud of your beautiful cookies as you devour them.

Sunday, January 1, 2012

Devil's Food Chocolate Sauce


Looking at this picture (note my shiny new cookbook holder!), you'd think I'd reached the end of the book. Well, technically that's true, but actually I still have a few recipes to go. Still, this is the last sauce recipe, and the sauce chapter comes at the end. If you've been following this blog, you know that the sauce chapter had a rocky beginning for me, from Top Secret to White Custard Cream. But this sauce is a winner, though I made some tweaks to it to make sure it really was extra good.


Looking at the ingredients, I saw that this sauce is a lot like Maida's World's Best Hot Fudge Sauce, our family's favorite, and so I decided to change the technique and one of the ingredients: that would be subbing in some brown sugar with the white sugar.


Maida warns several times that this sauce likes to burn, and I could see why: she was cooking the chocolate along with the other ingredients. I decided to sidestep that issue by cooking the butter, sugar, and cream together first, and then adding the chocolate off the heat.


So here you see yummy caramelly butteriness getting ready to meet delicious dark chocolate. It was meant to be.


After a bit of whisking off the heat, it all turns to a lovely, creamy-smooth and very chocolatey sauce, without the worry about the horror that is burned chocolate.
We had this as part of a New Year's Eve dessert extravaganza that involved profiteroles with two kinds of ice cream, salted butter caramel, and toasted almonds. And this sauce won over the (excellent) caramel sauce hands-down. I'm sure that once I recover from the holiday binge, I'll also enjoy it just over ice cream. Actually, yesterday two of my family members had hot fudge sundaes for breakfast. It was, after all, the last day of vacation.
I'm still trying to decide whether I like this sauce, which has more butter and unsweetened chocolate along with the cocoa powder, better than the World's Best sauce. This one has a creamier texture and the other has a chewier texture, but if I don't have them side-by-side (and it would be a terrible thing for me to attempt that!), I don't think the difference is apparent. 
Bottom line: you should make this sauce. The 15 minutes it takes are well worth it.

Devil's Food Chocolate Sauce

1/2 c. (4 oz.) cream
1/3 c. (2.3 oz.) sugar
1/3 c. (2/3 oz.) brown sugar
Pinch salt
1/2 c. (4 oz.) butter
1 oz. unsweetened chocolate, chopped
1/4 c. (0.75 oz.) unsweetened cocoa
1 t. vanilla

Put the cream, sugar, brown sugar, salt, and butter in a heavy small saucepan and place over medium heat; cook, stirring often, until the butter and sugar have melted and it's bubbling furiously. If you like a caramel edge to your sauce (I do), let cook another minute or two without stirring. Take off the heat and whisk in the chocolate, cocoa, and vanilla. Let cool for a few minutes and serve over ice cream. You can also pour this into a jar and refrigerate for later--you can either microwave it briefly or put the jar in a saucepan with hot water.