Sunday, May 29, 2011

Candy Cookies


I mentioned in a recent Facebook post that I needed excuses to not pack boxes for our move coming up in, oh, 3 days. My friend Karen immediately posted, "Maybe Maida can provide one..." Of course, she was right. You know what I'm not doing right now?

But in a way, I had to make these cookies. I had volunteered to bake for a fundraiser for the girls' school--the Japanese section was giving baked goods to people who made donations for earthquake relief. So it was for a good cause.

And this was not an all-day project: these are basically chocolate chip cookies with Heath bar pieces rather than chocolate chips. My Heath bar substitute was a milk chocolate bar with toffee chips, which was not exactly ideal, as you'll see below.

The "chips" kind of melted and ran and burned, so these cookies do not exactly win any beauty contests. However, they were really delicious. The girls and I did a bit of quality control on the dough and on the cookies and gave it the thumbs-up. And Julia stopped by the donation stand during the day to see whether there were any left--not a single one. That's a tribute more to the generosity to my fellow Lycée International parents than to the cookies. I hope these were enjoyed by all.
A few recipe notes: this recipe is written to make 24 big cookies. I wanted to get more cookies, so I made 1-1/2 the recipe and made them rather small. Still, I think I only got 36.

Here's the recipe. You don't really need an excuse to make them, do you?

Candy Cookies

1/2 c. (4 oz.) butter, room temperature
1/2 t. salt
1/2 t. baking soda
1/2 t. vanilla
1/3 c. (2.3 oz.) sugar
1/3 c. (2.3 oz.) brown sugar
1 large egg
1-1/4 c. (6.25 oz.) unsifted flour
1 c. (4 oz.) coarsely chopped walnuts
9 oz. Heath (or Skor or Daim) bars, chopped in 1/4-inch pieces, or toffee bits (probably 1-1/2 cup)

Heat the oven to 375; get out cookie sheets and your favorite liners (foil/parchment/silicone).
Cream the butter with the salt, baking soda, and vanilla until light and fluffy. Add the sugar and brown sugar and beat another minute or two until lighter in color. Beat in the egg and again beat for a minute or two. Stir in the flour at low speed. Take the bowl off the mixer and stir in the walnuts and Heath bar pieces.
Scoop out the dough by rounded tablespoonsful onto the lined cookie sheets--I got about 9 to a sheet. Bake two sheets at a time for 13-15 minutes until the cookies are lightly browned. Cool on a rack. Heartlessly ignore the pleas of your family as you give the cookies away.

Wednesday, May 25, 2011

Tassies

Yesterday I had a day off. A couple of months ago, my free days were common and I got bored. Now they're precious and I try to use them as best I can. So I did my best yesterday to do some important things--some editing, some appointments, lots of emails, our taxes--but also some fun things. And I decided a baking project would be a fun thing to do.

When I saw this recipe come up on the roster, I was skeptical. It would seem I'm often skeptical of Maida's recipes.

I think I just couldn't get past the headnotes, in which she tells a long and complicated story about how you can't make these with long fingernails. And about how you need 4 mini-muffin pans to make them.

Maybe another reason was the 3 sticks of butter in the recipe, though that never stopped me before. But in any case, this seemed like one of those baking projects that would be fun and absorbing but not really have a payoff in terms of eating pleasure.

So I gathered my butter and dates and pecans and sugar and my short fingernails. I divided the recipe in half, calculating that I could make a dozen regular-sized muffin pastries that way (I was mostly right). I have one mini-muffin pan, and it's in storage. There's no way I'll ever have four.

I pressed the dough into the muffin cups (as you can see, I underestimated how much dough each little tart would need).

And before I knew it, these babies were ready for the oven. They weren't really even all that fussy!

Soon after these came out of the oven, I was on the phone with our financial advisor trying to figure out cost basis and other exciting tax-related things. The girls came home while I was listening and taking notes, but I heard them each exclaim, "It smells really great in here!" I signaled to them that they should help themselves.
I had trouble concentrating on figures while listening to the girls rave about these little pastries. "These are the BEST thing you've made, Mama!" By the time I'd gotten off the phone, five of them were already gone. When Sami came home and tried one, he asked if there were more and then bolted into the kitchen to get another.
I wish I could say this was a disappointment: the "project" turned out to be pretty easy and mostly just gosh-darned delicious. These are basically like the best pecan pie you'll ever eat. They're sweet but not overpowering. They make you wish you hadn't halved the recipe.

Here's the recipe (for the full amount, using standard muffin pans). Do yourself a favor and make them.

Tassies

8 oz. cream cheese, room temperature
1 c. (8 oz.) butter, cool room temperature
2 c. (8 oz.) sifted flour
Pinch salt

In a food processor, combine the cream cheese and butter; process until smooth. Pulse in the flour and salt. Scrape out the dough onto a piece of waxed paper and chill in the freezer at least 10 minutes. While it's chilling, you can make the filling:

1/2 c. (4 oz.) butter, room temperature
1 T. vanilla (I also added a splash of bourbon)
Pinch salt
2 c. (14 oz.) brown sugar
1 large egg
1 c. (8 oz.) pitted dates (use good ones), cut into 1/4-inch pieces with scissors
1-1/2 c. (5.5 oz.) toasted chopped pecans + 24 pecan halves (which I didn't have)

With an electric mixer, cream the butter until fluffy. Beat in the vanilla (and bourbon!) and salt, and then beat in the sugar and the egg. Mix until everything is smooth and fluffy. Stir in the dates and pecans.
Heat the oven to 350. Line 24 muffin cups with paper or silicone liners. Use a bench scraper or knife to cut the dough into 24 pieces. These pieces will look too big to you, but don't worry. Roll each piece into a ball and put it into a muffin cup. Use your thumb and fingers to press down on the middle and push up the sides of the cup. The dough should easily make it all the way up the sides of the cup. Don't worry if there are holes in the dough.
When you've made all the dough cups, put a spoonful or two of filling in each. There should be enough filling to go almost all the way up to the top on each cup. If you have the pecan halves, put one on each pastry.
Put the muffin pans on a foil-lined cookie sheet and bake, one at a time (unless they both fit on one rack) on the bottom rack for 35 minutes. The pastry should be brown and the filling should be bubbling.
Remove from the oven and let cool. Apparently these can be eaten quite warm, but they're also delicious at room temperature. But make sure you get one before they disappear.

Tuesday, May 24, 2011

Apple Cream Cheese Pie

I thought about titling this recipe "Bake cheesecake in haste, repent at leisure." Except we didn't repent: it turned out really well. But that was certainly more due to the strength of the recipe than my cooking skill or forethought.

It was Saturday evening, and we had guests coming for Sunday lunch. I was going to go to the store as soon as I'd finished all my grading. When I looked up from my computer, the sun was still shining brightly and I was sure it was only 5 or so. Uh, no. Now that it gets dark at about 10, 7:30 is the new 5. Oops, store closed.
Moment of panic: Cheesecake has to be made the night before! So I texted Sami, who was working on his car at his parents' house, to ask him if he could pick up cream cheese and spice cookies before the giant superstore near his parents' house closed at 9:30. No problem, he said. I should just write a detailed list and he'd send his parents.

In the meantime, I located all the ingredients for the apple filling and put myself to chopping and sautéing. Mmm...apples and raisins and ginger and walnuts.
So Sami came home with the spice cookies...and a tub of mascarpone. I'm afraid I didn't respond very graciously to that offering. "You can improvise," he said hopefully. "This is all my mom could find."
"You can't make cheesecake with mascarpone," I snapped. And then I went to bed, wondering whether I should change my planned dessert after all.
But no, I got up bright and early and made a lovely crumb crust with the speculoos cookies Sami had brought home. And then I went out to the market for all the meat and cheese and vegetables and bread I would need for a giant lunch. And I bought the proper kind of cream cheese.
I'm sure it was 10:30 or later by the time I got to actually making the cheesecake batter. Fortunately, cheesecake batter takes about 5 minutes to make. Since I'd done everything else in advance, the cheesecake was ready to bake as soon as the oven was preheated. In between roasting a leg of lamb and asparagus and making gougères and barley pilaf, I put the baked and cooled cheesecake in the freezer and crossed my fingers. By some miracle I had just about everything ready to go when the guests arrived.
Well, it all worked out great. One thing I had not taken into account, of course, was that this was a proper Sunday lunch, so even though the guests arrived around 12:30 and we started eating shortly thereafter, dessert didn't actually roll around until 4. The cheesecake was properly chilled but not frozen. And it was delicious.
"Wow, there's a lot going on in this cheesecake," our friends said as we polished off every bite. They had no idea.

Here's the recipe. Make it when you have time. Or not.

Apple Cream Cheese Pie

1-1/4 c. (5.3 oz.) graham cracker crumbs (I used speculoos because graham crackers are hard to find here, and I therefore eliminated the sugar and spices)
1 T. sugar
1 t. cinnamon
1/2 t. nutmeg
1/2 t. ginger
Pinch allspice
6 T. (3 oz.) butter, melted

(Assuming you already have your cream cheese, now's a good time to get it out of the fridge.) Heat the oven to 350. Line a deep 9-inch pie plate with aluminum foil. In a food processor, grind the graham crackers with the sugar, cinnamon, nutmeg, ginger, and allspice. Add the butter and pulse until it's all combined. Pour the buttered crumbs into the foil-lined pie plate and press them into the bottom and as far up the sides as you can safely go.
Bake the crust for about 10 minutes, until beginning to brown. Let cool, and then freeze for at least an hour. Very carefully remove the crust by the foil, peel off the foil, and put the crust back in the pie plate. Let the crust sit at room temperature while you make the fillings.

2 large or 3 medium tart apples, like Granny Smith, Braeburn, or Pink Lady
1 T. butter
3 T. (1.3 oz.) brown sugar
1-2 t. lemon juice
1 t. cinnamon
1/4 t. nutmeg
1/4 c. (1.25 oz.) raisins
1/2 c. (2 oz.) walnuts, chopped medium-fine
3-4 T. chopped candied ginger

Peel, quarter, and core the apples and cut them into 3/4-inch chunks. Melt the butter in a large frying pan over medium-high heat. Add the apples, sugar, and lemon juice. Stir to coat the apples, then cover the pan and let the apples cook a few minutes until they begin to become tender. Take off the lid and continue to cook until the liquid is almost all evaporated. Add the raisins and cook a minute for them to plump up a bit, then add the walnuts and ginger and take off the heat. Let stand to cool while you make the cream cheese filling.

12 oz. cream cheese, room temperature
1 t. vanilla
1/2 c. (3.5 oz.) sugar
1/3 c. (2.6 oz.) cream or sour cream
2 large eggs

Heat the oven back up to 350. In the bowl of a mixer, beat the cream cheese until soft and fluffy. Beat in the vanilla and sugar until mixed, then beat in the cream, and finally beat in the eggs one at a time. You don't need to beat this a long time--just until everything is smooth.
Now pour the sautéed apples onto the crumb crust. Carefully pour the cheesecake batter over that. Maida notes, and I have a note from many years ago, that you might have more batter than will fit in the pie plate. If so, pour it into little custard cups--you can bake those for an extra "chef's bonus". This time around I didn't have that problem. Maybe my apples were smaller.
In any case, put in the preheated oven and bake for 25 minutes--the top will be browned in spots. Cool to room temperature and then refrigerate overnight or freeze until everyone has had their cheese course. Expect no leftovers.

Sunday, May 22, 2011

Caramel Fudge Pecan Brownies

This recipe, sad to say, promises more than it can deliver. Caramel? In this recipe, that's the brown sugar. Fudge? Well, they're kind of fudgy. But there's an awful lot of flour in these...

I should backpedal and say that by no means are these bad brownies. Two kinds of chocolate, lots of butter, toasted pecans...that all makes a good brownie, especially frozen.

If these had been called Alabama Pecan Brownies, I would have been perfectly satisfied.

Look, these brownies are not going to knock you naked any time soon. But on the other hand, they don't involve cake mix or processed caramels. No shortcuts for Maida!

And really, who needs shortcuts with brownies? So to summarize, these are good brownies. If you like your brownies on the sweet-ish side and you like pecans (maybe a bit of bourbon would further add to the Southern pecan thing going on), you will love these.

Here's the recipe. Enjoy these brownies for what they are.

"Caramel Fudge" Pecan Brownies

1 c. (8 oz.) butter
4 oz. unsweetened chocolate
1 oz. semisweet chocolate
1/2 c. (3.5 oz.) sugar
2-1/3 c. (1 lb.) dark brown sugar
2 t. vanilla (plus a splash of bourbon?)
4 large eggs
2 c. (8 oz.) sifted flour
1/4 t. salt
1/2 t. baking powder
2-1/4 c. (8 oz.) toasted pecan halves

Heat the oven to 350. Line a 13x9-inch pan with foil and butter the foil.
In a large microwave-safe bowl, melt the butter with the chocolates at 30 second intervals: it should take 1-1/2 to 2 minutes. Make sure you stir well in between the 30-second bursts.
Stir in the sugar and brown sugar; then mix in the vanilla/bourbon. Add the eggs one at a time, stirring well after each. Add the flour, salt, and baking powder and stir until incorporated. Mix in the pecans.
Pour in the foil-lined pan and bake for 40-45 minutes or until a toothpick comes out just clean. Let stand until cool. Put the pan in the freezer for an hour, or the refrigerator for somewhat longer, until the brownies are quite firm. Cut carefully into squares or rectangles as big or as small as you think you can handle. Wrap the brownies and keep them on the counter or in the freezer. Share as many as you think would be appropriate.

Tuesday, May 17, 2011

Salted Almond Chocolate Pie

I'm not sure what to say about this pie except that it involves chocolate and almonds and marshmallows--kind of a Rocky Road pie. It's also very easy to make and even easier to eat.

I wasn't able to take a lot of pictures of the process because the camera was off being used for "prom" pictures. Frozen chocolate pie can be nice to have around when one thinks too hard about the teenaged life forms in the house beginning to look like adults.

Here's the recipe. Make this if you love rocky road.

Salted Almond Chocolate Pie

6 oz. chocolate wafer cookies, crushed into crumbs
6 T. (3 oz.) melted butter

Heat the oven to 300. Line a 9-inch pie plate with aluminum foil. Mix together the cookies and butter and carefully press into the bottom and up the sides of the pan--mine wouldn't go far up the sides of the pan. Bake for about 15 minutes. Let cool (Maida wants you to turn off the oven and let it cool in there for a while, but I took it out and let it cool on the counter, and it was fine) to room temperature and then freeze for at least an hour. Carefully remove the crust with the foil, then peel off the foil and return the crust to the pan. Return the pan to the freezer while you make the filling:

20 large marshmallows (5 oz.; I used mini marshmallows, but they didn't melt very well)
1/2 c. (4 oz.) light cream or half-and-half
8 oz. milk chocolate (use a good kind), broken into pieces
1/3 c. (1.3 oz.) roasted salted almonds, coarsely chopped (I used roasted almonds and added a bit of fleur de sel, because, la-di-da)
1 c. (8 oz.) whipping cream

Use scissors to cut up 16 (4 oz.) of the marshmallows into a large microwave-safe bowl. Add the cream and microwave a minute or two until the marshmallows are melted. Add the chocolate and stir. If the chocolate doesn't melt entirely, give it 30 seconds in the microwave, but be careful because milk chocolate burns easily. Add the nuts and the 4 remaining marshmallows, cut into small pieces. Let sit for a while to cool and thicken. When the mixture is cool and thick, put the whipping cream in a bowl and whip it until it holds a shape. Carefully fold the cream into the chocolate--I did it in two additions.
Take the crust out of the freezer and pour the filling in. Smooth the top, cover with plastic, and freeze at least 3 hours. We got impatient and tried it before then and it was good, but it's better when it's frozen a bit firmer. It doesn't get really hard. Enjoy the taste of summer and childhood.

Saturday, May 14, 2011

Marbleized Spice Cake

This cake was another of the many times when the process was probably more satisfying than the product--even though the product is very good. I *needed* to bake this cake.

Yes, I've been writing depressing posts about feeling overwhelmed. But things seem to be looking up, and I seem to have time to do my own baking again. This cake was one step on that road.

It was Thursday afternoon. I was home from school, and I promised myself that if I could finish my editing, I could bake a cake. I'm sure I could have caught up on my cleaning or volunteer work or one of the many administrative tasks I need to do, but I really wanted to turn butter and sugar and flour into something beautiful. Some people want Calgon to take them away, but for me that would just involve scrubbing the bathtub. Spice cake, take me away!

This cake turned out to be a fun and absorbing task. There are two separate batters that I made with two separate processes--traditional creaming and reverse creaming--just as an experiment. I halved the recipe because I didn't think we had anyone to foist cake on.

The reverse creaming was a good idea--one I had after I made the Kentucky cake, I believe. The cake batters used here are in fact quite similar to that cake. The light batter has butter and egg whites, and I haven't had luck folding egg whites into a heavy butter cake batter. This worked great and had a very nice crumb.


The cake did, in fact, do everything I wanted it to--it was fun, it worked the way I wanted it to, it made the house smell great, and it tasted really good.


The one thing about this cake is that you need to warn people about to eat it that it is not in fact a chocolate marble cake. I know I would be disappointed if I bit into a spice cake that was supposed to be chocolate cake. And it might be fun to have raisins in the spice part.

Here's the recipe. Make it if you need a break or a project or just a delicious spice cake. I'm giving the full ingredient list for a tube pan but giving my instructions for the white layer. If you halve the recipe, you'll have enough for a loaf cake.

Marbleized Spice Cake

2-1/2 c. (8.75 oz.) sifted cake flour
2 t. baking powder
1/4 t. salt
1 c. (7 oz.) sugar
3/4 c. (6 oz.) milk
1 t. vanilla
1/4 t. almond extract
4 egg whites (you'll need the yolks for the dark batter)
1/2 c. (4 oz.) butter, room temperature (this is important: reverse creaming doesn't work with cold butter)


Heat the oven to 350. Grease a large tube pan and dust with bread crumbs, ground nuts, or cocoa powder.
In the large bowl of an electric (stand) mixer, mix the flour, baking powder, salt, and sugar for 30 seconds to mix. In a measuring cup, whisk together the milk, vanilla, almond extract, and egg whites. Add all the butter and about half the liquid to the flour mixture. Beat first at low speed (flour will fly!) and then at medium speed for about 2 minutes. Scrape down the bowl. Add the remaining liquid ingredients in two additions, beating about a minute after each one and scraping down the bowl in between. The batter should be light and fluffy. Let that sit while you make the dark batter:

1/2 c. (4 oz.) butter, room temperature
1 t. baking soda
1 t. cinnamon
1/2 t. nutmeg
1/2 t. ginger
1/4 t. salt
1 T. cocoa powder
1 t. powdered instant coffee
1 c. (7 oz.) brown sugar
4 egg yolks
1/2 c. (5 oz.) molasses
2 c. (7 oz.) sifted cake flour
1 c. (8 oz.) plain yogurt

In a large bowl using a hand mixture, cream together the butter, baking soda, cinnamon, nutmeg, ginger, salt, cocoa powder, and coffee until light and fluffy. Gradually add the brown sugar and beat another minute or two until the color has lightened a bit. Add the egg yolks all at once along with the molasses and again beat until smooth and a bit lighter in color. On low speed add the flour in three additions alternately with the yogurt in two additions. Now you're ready to marbleize.
Put a few large spoonfuls of dark batter in the bottom of the cake pan. Put a few spoonfuls of light batter in any spaces between the dark batter. Continue to layer on the cake batter until it's gone (I had about three layers). Give the pan a bit of a shake or a twist to settle it.
Bake the cake for about an hour or until a toothpick comes out clean. Let cool for about 10 minutes before unmolding onto a rack. Let cool completely before slicing. And remember to tell people it's a spice cake!

Chocolate Bread

This blog entry is brought to you by my lovely daughters, Julia and Claire, who did every bit of the production of this bread.

That weekend I happened to be buried under editing and grading and couldn't figure out how I was going to spend any time baking. But Claire happened to have some free time, and she wanted to bake. So I asked her to make this chocolate bread.

Julia also had some time and offered to do the food styling and photography. Can you tell?

One thing that Claire really appreciated as she made this bread--she had never made yeast bread before--were Maida's extremely specific and detailed instructions. When I write down the recipes, I probably leave out steps that are obvious to me but not to beginning bakers. But Maida really holds the baker's hand. I still had to show Claire how to knead bread, though.

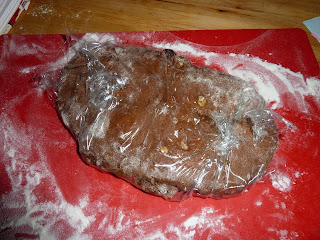
Claire followed the recipe to the letter, except for the raisins. I wanted raisins, though, so we put raisins in half the dough and just walnuts in the other half. That's why the bread looks a little funny--it's two balls of dough in one loaf.

This is the last yeast bread recipe in the book, and I'm kind of sad about that--as I've mentioned before, Maida's yeast breads always turn out really well and are fun to work with.

This bread is really interesting--it's not a sweet bread necessarily and it's not super chocolatey. It just has an interesting, complex flavor and bitter edge that allows it to go in many directions. I liked it a lot with butter and honey, but I also really liked it with a creamy ripe cheese (a Brillat-Savarin). Julia toasted hers and ate it with almond butter. We put in some dried cherries because we didn't have enough raisins, and that was a nice touch as well. So this is a great bread for breakfast or a cheese course, but it's definitely not dessert.

Here's the recipe. Make it when you have some time and want to try something different.

Chocolate Bread

4 c. (20 oz.) bread or all-purpose flour (you can use some whole-wheat)
1 envelope instant ("rapid-rise") yeast
1/2 c. (3.5 oz.) sugar
1 t. salt
2/3 c. (2 oz.) cocoa powder
2 t. instant coffee (or if you have coffee made, you can use 1/4 c. coffee instead of the water below)
1/4 c. (2 oz.) warm water
1 c. (8 oz.) milk
2 T. (1 oz.) butter, room temperature
2 large eggs
1 t. vanilla
1 c. (4 oz.) chopped walnuts
1/2 c. (2.5 oz.) raisins or dried cherries

In the bowl of a mixer, mix the flour, yeast, sugar, salt, cocoa powder, and instant coffee. Add the water, milk, butter, eggs, and vanilla and beat until well mixed. Stir in the nuts and raisins. Either switch to the dough hook or take the dough out and put it on a floured surface and knead it until smooth and elastic. Let the dough rise in a warm place until doubled--at least an hour. Punch down the dough, knead a bit, and shape into a loaf by rolling it out into an oval and rolling that oval up jelly-roll style. Put the loaf in a buttered loaf pan. Cover with buttered plastic wrap and let rise another hour or so, again until doubled (Claire said that hers never really doubled, but it turned out well anyway).
When the dough has almost finished its rising time, heat the oven to 350. When it's preheated, put the bread in and set the timer for 20-30 minutes. At the end of that time, cover the bread with foil so that the top doesn't burn while the bread bakes, and let it bake for another 30-40 minutes--total baking time should be about an hour. I just learned today that the proper temperature for bread is 210 F, so if you have a thermometer, take your bread's temperature to make sure it's done.
When the bread is done, remove it from the oven and let it cool 5-10 minutes. Unmold it from the pan and let cool on a wire rack. It's probably best to let this cool at least an hour before you slice into it.

Thursday, May 5, 2011

World War II Raisin Squares


This is, according to Maida, also called Depression Cake, which rather matched my mood when I made them a couple of weeks ago. I've been busy and overwhelmed--busy with extra teaching and extra editing--and overwhelmed with that sense of "what the heck am I doing here?" So although I had no time to bake, I made time because it's my time in the kitchen that makes sense to me.

But it wasn't just the name that made these the perfect thing to make. They're quick and easy, they make the kitchen smell great, and they keep a long time, making them a great snack after a long day at work. Alicia would probably despise them (unless she made them with some dried fruit or nut mix), but I bet my dad would love these, given his penchant for spice cake and applesauce cookies--and raisins.

Here's the recipe. Make them when you need a little something to pick you up.

World War II Raisin Squares

1-1/2 c. (8 oz.) raisins (I used a mixture of dark and golden)
2-1/2 c. (20 oz.) water
1/3 c. + 1 T. (3 oz. more or less) oil (or melted butter)
3/4 c. (5.25 oz.) sugar
1 t. baking soda
1 c. (4 oz.) sifted flour
1 c. (4.5 oz.) sifted whole wheat flour
1 t. cinnamon
1 t. allspice
1 t. cloves
1/2 t. nutmeg
1/4 t. ground ginger
1/2 t. salt
1 T. cocoa powder
1 T. espresso/coffee powder
Grated rind of 1 lemon

Heat the oven to 350. Grease a 9-inch square pan, which you should line with foil or parchment should you plan to unmold the cake/cookies in one piece. I'm not fancy enough for that.
Put the raisins and water in a medium saucepan and bring to a boil. Reduce the heat and let simmer, partially covered, for 15-20 minutes. This step is important even if you have nice, plump raisins, so don't skip it. Drain the raisins, saving 1 c. of the liquid for later use.
Put the water in a large bowl and add the oil/butter, sugar, and baking soda to it. The soda will fizz and dissolve, which is a nice touch. In another bowl, whisk together the flours, cinnamon, allspice, cloves, nutmeg, ginger, salt, cocoa, and espresso. Add the flour mixture to the water mixture and stir well. Add the lemon rind and the drained raisins.
Pour the mixture into the prepared pan and bake for 30-35 minutes or until the top springs back when touched. Cool in the pan; if you're going to unmold the cake, do it after about 10-15 minutes of cooling. Otherwise, let cool completely and cut into squares. Enjoy the homey taste.