Monday, December 27, 2010

Williams-Sonoma Chocolate Cake

Last week, the lead up to Christmas, was really fun. We interspersed trips into Paris for shopping, dining, and avant-garde circus with staying at home and relaxing. And cooking. And eating.
We also had some friends from work over for dinner. I went into my usual "Oh my gosh, I have to feed French people!" frenzy, compounded by the additional stressor that one of the guests managed a restaurant in England. He told us stories about Gordon Ramsay. Gulp.
But things went well. I made this tart and a fabulous oven cioppino-type thing, and I made this cake.

There's a cake recipe that everyone in France makes--it's on the label of every bar of dessert chocolate. It's called Moelleux du Chocolat--a cake that's light on flour and heavy on chocolate. This cake is like that. But the port adds an extra zing.

There are many things to like about this cake. One is that it's super easy to make--a bit like making brownies, except that you beat in egg whites.

Another is that you can make most of the batter ahead of time, and then just whip the egg whites, fold them in, and pop the cake in the oven so that it can be served warm for dessert.

And finally, it may not be the most beautiful of cakes, but it's delicious--soft and dark and delicious. We ate it with custard sauce--our English guest was so pleased--and every bit of it disappeared. It's the kind of dessert that is satisfyingly chocolatey but doesn't hit you over the head like a chocolate mousse would.

Here's the recipe. Consider it for your next dinner party.

Williams-Sonoma Chocolate Cake

1/2 c. (4 oz.) butter
1/2 c. (4 oz.) port (I think either tawny or ruby would be fine here)
4 oz. semisweet chocolate
2/3 c. (4.8 oz.) sugar (Maida calls for a full cup, but I think that would be way too much!)
3 large eggs, separated
3/4 c. (3 oz.) sifted flour
1/8 t. salt

Heat the oven to 325 (or wait if you're going to bake this at the last minute). Line the bottom of a 10-inch springform with a circle of parchment and grease and flour the pan and paper.
Melt the butter and chocolate with the port either in a heavy-bottomed saucepan over medium-low heat or in the microwave. Let cool.
Beat the egg yolks with all but 2 T. of the sugar (4 oz.) until light and thick; you can do this with an electric mixer or a whisk and some elbow grease. Gradually add the chocolate mixture and beat that until smooth. Then stir in the flour. (You can set aside this batter for a while until you're ready to bake. Keep everything, including the egg whites, at room temperature.)
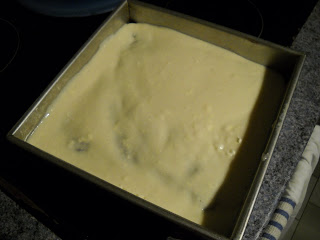
When you're ready to bake, make sure the oven is heated to 325. Now beat the egg whites with the salt until they hold a soft shape; gradually beat in the remaining 2 T. sugar and beat until they hold a fairly stiff shape. Fold the egg whites gradually into the chocolate mixture; you should not be too thorough.
Pour the batter into the prepared pan and bake for about 30 minutes (check earlier if your oven runs hot). Let cool in the pan for 5 minutes, then unmold. Serve hot with whipped cream or custard sauce and/or fruit. Enjoy the praise of your guests.

Thursday, December 16, 2010

Charleston Cheesecake Bars

We are in cookie overload right now--not that there's anything wrong with that. I have about four containers of cookies sitting on the counter, and I have cookie dough in the fridge. There's snow predicted for tomorrow, and the impending chaos that comes with it, and what did I get on my trip to the store? Flour, sugar, butter, and eggs. We must not have a baking crisis!

I have been bringing cookies to every possible event. I send cookies with the girls and Sami whenever there's the least occasion. I give cookies as tips. Just now, the postman came with a package, and after I buzzed him up, I quickly made a package of cookies.

These were a favorite. I brought them to a coffee, and they were appreciated there; I gave them to one of Claire's teachers, and I hope she likes them. And of course the family tried to eat as many as possible before I could give them all away.

This is a really great recipe in that it combines two really great dessert items: streusel and cheesecake.

The cheesecake is creamy and lemony; the streusel is crunchy and buttery.

And you eat it in bite-sized portions so it doesn't seem quite so decadent.

Here's the recipe. Make it when you want a cookie for dessert, or a dessert as a cookie.

Charleston Cheesecake Bars

1/2 c. (4 oz.) butter
1/2 t. cinnamon
1/4 t. salt
1/2 c. (3.5 oz.) brown sugar
1 c. (4 oz.) sifted flour
1/2 c. (2 oz.) toasted pecans, chopped
1 c. (2.8 oz.) quick or normal oats

Heat the oven to 350; line an 8-inch square baking dish with foil or parchment. If you're using foil, grease it.
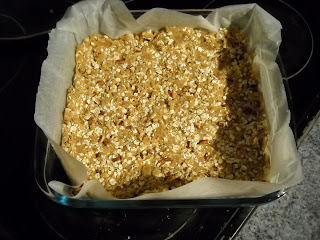
In the bowl of an electric mixer, cream together the butter, cinnamon, and salt until soft; add the sugar and beat another minute or until light and well mixed. On low speed or by hand, mix in the flour, pecans, and oats. Set aside one cup of this mixture for later; pat the rest into the prepared baking pan and bake for 15 minutes. While it's baking, make the filling:

8 oz. cream cheese
1/2 c. (3.5 oz.) sugar
1 egg
2 T. (1 oz.) sour cream
Finely grated rind of 1 lemon
1 T. lemon juice

You can use the same mixing bowl that you just used for the crust. Put the cream cheese in there and beat until soft. Beat in the sugar, egg, and sour cream just until smooth. Stir in the lemon rind and juice.
Pour the cheese mixture over the baked crust and sprinkle the reserved streusel over that. Press the streusel to make it even and keep it firmly attached to the filling. Put the dish back in the oven and let it bake for 25 minutes, or until the topping is nice and golden brown. Cool this completely at room temperature and then either freeze it for an hour or chill it overnight. Remove from the pan, cut it into squares, and put it back in the refrigerator: these are best cold. Enjoy giving or keeping these.

Saturday, December 11, 2010

Raspberry Pears

Sometimes a simple fruit dessert is just the thing. Especially when winter is coming and you've been baking cookies and not giving them away fast enough. Sometimes something cool and refreshing and not too sweet really hits the spot.

These raspberry pears turned out to be that thing. I had to modify the recipe considerably to make up for ingredients I didn't have:

Namely, "frozen red raspberries in syrup" and framboise or kirsch. I just didn't feel like going out and buying a bottle. Cassis was a nice alternative. And see that lemon? I didn't end up using that either.

Maida wants you to put the pears in lemon water until you cook them. But really, they didn't have time to brown, and they get covered in raspberry sauce. What's the point?

Maida also has you leave the pears uncored. I rather regretted not coring the pears--they were certainly more stable that way, but they were awkward to cut up and eat once they were cooked. I also imagine they'd soak up more raspberry sauce that way.

I don't know what I did, but I had way more raspberry sauce than Maida said I would--probably because I used a 1-lb. bag of raspberries rather than a 10-oz container. But that raspberry sauce was really good on lots of things: we used it on crêpes and on yogurt, among other things.

This is an easy and versatile recipe: you could serve the pears over waffles for breakfast or over ice cream for dessert. They're really good just by themselves as well.

Here's the recipe as I adapted it. Make it when you need a break from butter.

Raspberry Pears

1 16-oz. bag frozen raspberries
2-3 T. sugar
2 T. honey
2 T. + 1 t. framboise, kirsch, or cassis (basically, any liqueur that you think would go with pears and raspberries)
4 pears (I would use Anjou or Bosc but not Bartlett)

Make these the day before you want to eat them.
Toss the raspberries and sugar together and put in a sieve over a glass measuring cup to thaw. When they are thawed (this will take at least 2 hours, depending on how warm your kitchen is), push them through the sieve with a spoon. This is a tedious process and you will end up throwing away a lot of raspberry seeds/pulp, but it makes a nice smooth sauce. Don't forget to scrape the bottom of the sieve! Mix in the honey and 2 T. liqueur.
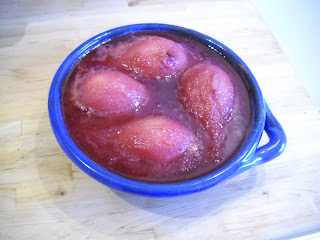
Peel the pears (core them if you wish) and put them in a saucepan or skillet just large enough to hold them. Pour the raspberry sauce over, cover the pan, and cook over medium heat until the sauce comes to a boil. Turn the heat down to a simmer and let the pears cook about 20 minutes, basting and/or turning occasionally. Put the lid askew on the pan so that some steam can escape and cook another 15-20 minutes, until the pears are just tender.
Transfer the pears to a bowl. Add the teaspoon of liqueur to the sauce and pour it over the pears. Let cool to room temperature and then chill, probably overnight. Serve as you see fit.
Now, if you'll excuse me, I believe I have some cookies to bake.


Saturday, December 4, 2010

Wild Rice Pudding

When I was little, I used to be happy when there was leftover rice: Mom would almost always turn it into rice pudding. She'd spoon it into a casserole dish with some raisins (unless Alicia won the day), make a blender custard from the Joy of Cooking, and in the oven it went. Yummy--creamy, chewy, nutmeg-y.
She also sometimes made us custard or rice pudding when we were sick. So when Julia was home sick the other day, it seemed like a good time to finally make this wild rice pudding.

I was rather skeptical about the whole wild rice in pudding thing. Sure, wild rice is quintessentially American and all, but it's chewy and has that kind of grassy taste. Does it really belong in comfort food like rice pudding? I decided to make a half recipe, so as not to waste my precious stash of wild rice.

Julia helped with the food prep and photography. I let her portion out the raisins, and you can see she's overcome her raisin phobia.

The verdict? This would have made an awesome regular rice pudding. The custard is decadently creamy and delicious, but I found the wild rice's texture to be a bit off-putting. This is not to say, however, that these three portions of pudding did not disappear in record time. Julia ate hers while it was still warm. Claire ate mine, even though I protested that she wouldn't like it because it had raisins, in one rapid sitting when she came home from school. And Sami let me have a few bites of his later in the day.
This is not an everyday, oh-I-have-leftover-rice like Mom's standby recipe--it's a lot creamier and fussier, since you cook it before you bake it. But if you're looking for a luxurious custard with some chewy grain in it, look no further.
Here's the recipe. I'm giving you the full 6 portions.

Wild Rice Pudding

Generous 6 T. wild rice
1/4 c. light raisins (I bet you could use dried cherries or cranberries)
2 c. cream
4 egg yolks
1/4 c. sugar
Generous pinch nutmeg
Pinch salt
1/2 t. vanilla
1/4 t. almond extract

Rinse the rice and then cook it in a fairly generous amount of boiling water for about 45 minutes (or follow package directions); drain. The rice should be tender, and probably some of it will be split.
Heat the oven to 325. Get out 6 custard cups and a baking dish large enough to contain them. Divide the rice and raisins evenly among them. In a medium saucepan, heat the cream over medium heat until there are little bubbles around the side and it is starting to steam. While you're heating the cream, in a medium mixing bowl (or maybe a 4-cup Pyrex measure), whisk the egg yolks with the sugar, nutmeg, salt, vanilla, and almond extract. When the cream is hot, pour some of it slowly into the egg yolk mixture, whisking all the time. Then return that to the saucepan and cook, whisking, over fairly low heat until the mixture thickens some--Maida says it should reach 174 degrees. This takes about 10 minutes. Strain through a fine strainer into the custard cups. Ours curdled some but was fine after we'd strained it.
Put the custard cups into the baking dish. Very carefully pour boiling water into the baking dish so that it comes about one inch up the sides of the cups--it may be safer to do this when the baking dish is already in the oven. Bake for about 25-30 minutes, but check after 20. Give the baking dish a little jiggle. If the custards look liquid-y, then need more time. If they look solid or just have a minor jiggle, they're perfect. Very carefully remove the baking pan from the oven and then very carefully remove the custard cups from the hot water. Silicon potholders are great here because the cloth kind can soak up hot water--ouch! Maida recommends that you cool these to room temperature and then chill for a few hours. I tried Julia's warm pudding and Sami's cold pudding and I liked both. Enjoy these in good health.

Wednesday, December 1, 2010

Carol's Crescents

I need more holiday spirit. Sure, I cooked a Thanksgiving turkey. I went to the school's holiday sale and picked up an Advent wreath and an Advent calendar, which I filled with goodies and hung up. It's snowing outside, for crying out loud. But I'm not feeling it. I think I need to bake more cookies.

These are technically not cookies: they're "yeast pastries". Yes, they have yeast in them. But they also have a ton of butter and sour cream. They were fun to make, and they made lots of people smile. Maybe "yeast cookies"? No, that sounds awful.

These are really rugelach--Eastern European Jewish pastry at its finest. I handed out a lot of these--at a parents' meeting, at the market--people first said, "Mmm! This is delicious!" and "Madame, you are adorable," and even "Congratulations!" (I think the translation for the French adorable is actually closer to "sweet". And I guess "Félicitations" is something you say when you're giving compliments. You learn a lot when you hand out cookies.)

But then they asked, "What kind of pastry is this? Where does it come from? (Why isn't it French?)" It's always hard to answer that kind of question. I just usually shrug, "Well, you know, we Americans take our cuisine a little bit from everywhere." (But I love that people are interested in this!) The recipe comes from an American desserts cookbook, but this obviously has its roots elsewhere.
Just did a little research: the rugelach we know today, especially the recipe I have posted here, probably came from Hungary, and with the sour cream and walnuts, that makes sense. But read this little tidbit from Joan Nathan's Jewish Cooking in America, "

It was Mrs. Knopf's friend Maida Heatter who put rugelah on the culinary map with Mrs. Heatter's grandmother's recipe. It is the most sought after of all Mrs. Heatter's recipes and is the rugelach most often found in upscale bakeries nationwide."


This isn't even the famous recipe that Nathan refers to: That one is in Maida Heatter's Cookie book, and it involves cream cheese (an American innovation, thanks to Philadelphia cream cheese) and no yeast. But this one should be famous--and maybe it is now, throughout my little corner of the world.

Here's the recipe (French ingredients and grams for my friend Cécile, who asked for the recipe). Crank up the Christmas carols and be prepared to share with strangers.

Carol's Crescents

1 c. (8 oz./225 g.) butter
1 T. sugar (I used a package of vanilla sugar instead of the sugar/vanilla)
1 t. vanilla
1/4 t. almond extract
1 t. salt
1 c. (8 oz./225 g.) sour cream (I used crème fraîche legère)
3 egg yolks
1 package yeast
3 c. (15 oz./425 g.) flour (T55)

Make the dough the day before: Melt the butter in a large glass bowl or medium saucepan in the microwave or on the stove. Make sure it's cool enough to touch, then add the sugar, vanilla, almond, salt, sour cream, and egg yolks. Mix that together well, and then add the yeast and flour. Beat well with a wooden spoon for a few minutes. Turn the dough out onto a large piece of waxed or parchment paper, shape it into a fat cylinder, and refrigerate it.

When you're ready to roll and bake (and you can do this a bit at a time, depending on how many you need), get out the following:

1 c. (4 oz./115 g.) walnuts
1 c. (7 oz./195 g.) sugar
1 T. cinnamon
1-1/4 c. (6 oz./170 g.) currants or chopped raisins and/or chopped dried cherries

Consider starting with half the amount of walnuts/sugar/cinnamon; I only used about half of what I had. Put the walnuts and sugar in a food processor and pulse until the walnuts are pretty fine. Add the cinnamon.

Cut the refrigerated pastry into 5 more or less equal pieces. Sprinkle a few tablespoonsful of the walnut/cinnamon-sugar mixture onto a rolling mat or clean countertop. Roll out the dough into about a 6-inch circle; turn it over a few times and press in the walnuts as you go. Use a pizza cutter or long knife to cut the circle into 16 wedges. On the outside of each wedge press a few raisins/currants/cherries, and roll that baby up (the picture above may help you visualize what you should be doing). Put the rolls fairly close together on a parchment-lined baking sheet. Repeat with as many pieces of dough you have the patience for.
When you have a sheet full, heat the oven to 350 (180C). When it's preheated, the rolls have probably had enough time to rest (they won't rise despite the yeast) and can go in the oven for 20-25 minutes (mine took 15). Remove the crescents from the paper and cool on a rack.
Enjoy these fresh--once you've tasted one, you'll realize the importance of giving away as many as possible!

Sunday, November 28, 2010

Maple Pecan Pie

Ah, Thanksgiving in France. It's not the same in so many ways: no holiday, of course, no rush to the malls, no rush to the grocery store before it closes. People don't celebrate it, but they know about it: my butcher, upon my ordering the turkey, remarked, "Ah, yes, it's like Christmas for you guys, right?" The produce man I bought my sweet potatoes from said something similar and asked me how I was going to cook them. French people do get the idea of a holiday centered around food. They call it Sunday.

So we scheduled a small Thanksgiving feast, just another family and us (only 6 chairs in the apartment) for Friday evening. French eating times mean that I didn't have to put the turkey in the oven until 5:00 (and even then, it was too soon). So I had plenty of time in the morning to make pie.

Our Thanksgiving pie routine usually goes something like: 1 regular pumpkin, 1 fancy pumpkin, 1 chocolate, 2 "others" (normally one fruit and one pecan). This year I trimmed it down to three: 1 fancy pumpkin (made from fresh pumpkin), 1 chocolate, 1 maple-pecan from Maida Heatter. Julia was horrified that I had only made three pies for nine people. My argument that that meant 1/3 of a pie per person meant nothing to her.

Fortunately for this pie, pecans turn out to be easy to find here. There's a guy who sells dried fruit, nuts, dried beans, olives, etc. at the market, and I'm one of his best customers. I always enjoy going to see him because he's an outrageous flirt. "Would you like a bag for this, Madame, or shall I deliver it? I can't deliver it during the day, because I'm busy, but I can come by at night..." Anyway, he has delicious pecans. That will help me preserve my Trader Joe's stash.

I have a confession to make about this pie: it's supposed to be six individual tarts. I have tart pans and everything, but I couldn't see putting out six tarts for 9 people. Also, I had a lot more cooking to do. The proportions were perfect for a 9-inch pie plate, so although individual tarts would be charming, this worked out nicely.

This was a delicious pie. It didn't have a lot of maple flavor necessarily, probably because the rum came shining through, but it wasn't tooth-achingly sweet either, which was delightful. This was my favorite of the three pies (I made a sour cream pumpkin pie and found the sour cream too pronounced; chocolate pie is much too much for me after a large dinner).
And yes, there was enough pie. So much so that we were able to send a whole pie plate full to soccer the next day and still have a bunch in the fridge. In fact, if Julia hadn't put dibs on the last piece of pecan, I might be going to get myself a piece right now...

Here's the recipe. Make it when you're feeling festive.

Maple Pecan Pie

1-3/4 c. +2 T. (7.5 oz.) flour
1/4 t. salt
8 T. (4 oz.) butter
3 egg yolks
1-1/2 T. ice water

I think it's always best to make pie pastry the night before you want to use it--it needs to chill at least 4 hours.
Get out your food processor. I didn't use mine, and it was a mistake. Put in the flour and salt and buzz that briefly to mix. Put in the butter, cut into pieces, and pulse that until the mixture resembles coarse crumbs--the butter can be pretty fine here. Add the egg yolks and water and process until the mixture just holds together. Wrap in waxed paper and refrigerate.

When you're ready to start baking, roll out the dough on a floured surface until it makes an 11-inch circle. Carefully place into a 9-inch pie plate and crimp the edges. Refrigerate this while you make the filling.

2 large eggs
2/3 c. (7 oz.) maple syrup
2/3 c. (4.5 oz.) brown sugar
3/4 t. vanilla
1-1/2 T. (0.75 oz.) melted butter
2 t. (or more) dark rum (or bourbon or brandy)
2 c. (7 oz.) toasted pecan halves

Heat the oven to 350. In a bowl, whisk together the eggs, maple syrup, brown sugar, vanilla, butter, and booze. Now get out the prepared pie plate and pour the pecan halves in. If you want, you can try for a pattern, but that might be gilding the lily. Now pour the egg mixture over that. Pretty darned easy, right?
Bake the pie for about 45 minutes, or until the crust is golden brown and the filling is just a little bit jiggly but not runny. Let cool. You can serve this warm, room temperature, or cold. But I think you should serve it with boozy whipped cream:

1 c. whipping cream
1-2 T. powdered sugar
1/2 t. vanilla
1 T. booze (preferably the same kind you used in the pie)

Use an electric mixer to whip this until it forms soft peaks.
Now sit down and feel thankful for elastic-waist pants.

Monday, November 22, 2010

Down Home Apple Casserole

So here I was, cooking Sunday lunch for some French friends. The prospect often makes me nervous--after all, this is the land of gastronomy! But I cooked American recipes that I figured wouldn't upset French sensibilities, and it worked out quite nicely.

Of course, the dessert had to be Maida Heatter. I had the choice between this and a Wild Rice Pudding, and it was an easy choice. French people love "crumble", and a light-ish fruit dessert was a perfect way to finish a large meal. Also, I'm not sure whether people eat wild rice here. I'm still a bit skeptical about that dessert. Guess I'll find out more later in the week...

So our friends were coming at 12 or so, and I didn't start cooking until 10: 30: after going to the market and having breakfast. But no worries--this was really easy to do, once I'd sliced all the apples.

I'm going to have to have a talk with my produce family (seriously--a mother, grandmother, and son) about the apples they sold me. They told me the apples would keep their shape when cooking. Ha. Or maybe my French just sucks...

But you know, once you cover the (delicious) apple mush with cookie crumbs and almonds and butter and sugar, it disappears magically even though you've already had three courses.

Here's the recipe. Make it for yourself or for company.

Down Home Apple Casserole

1/4 c. (probably about an ounce--I eyeballed this) amaretti or other hard almond macaroons
1/3 c. (1.3 oz.) sliced almonds
2 lbs. tart cooking apples (Pink Lady or Braeburn would probably be good here), peeled and sliced
1/2 c. water
1/3 c. (2.3 oz) sugar--adjust to the sweetness of your apples
1/4 c. (1.2 oz.) raisins
1-2 t. lemon juice--adjust to the tartness of your apples
1/2 t. cinnamon
1/4 t. nutmeg
1/2 c. (4 oz.) cream
1 T. flour
1-1/2 T. (0.75 oz.) cold butter
1-2 T. sugar (white or raw)

Grind the amaretti to a paste; mix with almonds and set aside. Heat the oven to 400; butter a pie plate or other shallow pan.
Put the apples, water, sugar, and raisins in a large pan with a lid; bring to a boil over medium-high heat. Cover and simmer for about 10 minutes, or until the apples are barely tender (pay attention to them, unlike me!). If there seems to be excessive juice in the pan, uncover it and let the juice boil down a bit, but not too much. Take off the heat and add the lemon juice, cinnamon, and nutmeg. In a glass measuring cup, whisk together the cream and flour. Strain through a fine strainer into the apple mixture and mix that gently. Pour into the prepared pan. Sprinkle the almond/crumb mixture over that; dot with the butter and sprinkle with sugar. (You can do all this ahead and then bake it at the last minute--that's what I did.) Bake for 15 minutes, or until very bubbly. Maida suggests you brown it under the broiler, but I didn't find that necessary. Serve warm or cold with ice cream or The Governor's Crème Fraîche, and get ready for coffee and a nap.

Sunday, November 21, 2010

Chocolate Whoppers

This weekend I went to a "Chocolat Show" in Saint-Germain. There were tables with free samples from most of the good chocolatiers in town, and a few novelties: mole from a Mexican grocery (what a find!!), a chocolate fountain (with marshmallows for dipping), a ganache bar. It was fun and delicious and I found myself buying a few things just out of guilt for taking so many delicious free samples. I'm sure that's why they give them out.

But I had my own chocolate show earlier in the week: making Maida's Chocolate Whoppers. This recipe, which makes "15 tremendous cookies" or 24 normal-sized cookies, involves an entire 14 oz. of chocolate. Plus lots of nuts.

I used just regular supermarket chocolate this time: Meunier and Nestlé. They were perfectly suited for this kind of recipe.

Making these cookies is a lot like making brownies: melt butter and chocolate; add sugar and eggs and flour.

And a lot of chopped chocolate and nuts. The batter barely contains all the stuff.

And here are the little devils, all baked up. I baked them to bring to a meeting of parents and school administrators. Unfortunately, they didn't get noticed until the meeting was almost over, and I had trouble "selling" them (though those who tried one were effusive). So I brought home at least a dozen, if not more. That spelled danger with a capital D for me--these are my kind of cookies: crisp, a little salty, nutty, CHOCOLATE. So I handed the Tupperware filled with these to Sami and implored him to take them to work. On the way out, he gave one to our concierge (I guess that's like the super), who was on the phone but showed her delight through sign language. He told me that he then walked from office to office like Santa Claus, handing out cookies, and that he was "congratulated". Whatever that means.
In any case, we squeezed a lot of happiness out of a couple of dozen cookies. I just wish I'd had chance to eat more than two. Then again, maybe not. The Season of Chocolate is upon us...

Here's the recipe (as I made it), if you want to share the happiness.

Chocolate Whoppers

2 oz. unsweetened chocolate
6 oz. semisweet chocolate
3 oz. (6 T.) butter
2 t. instant espresso
1/4 t. baking powder
1/2 t. salt
3/4 c. (5 oz.) sugar
2 t. vanilla
2 eggs
1/4 c. (1 oz.) flour
6 oz. chopped chocolate (or 1 c. chocolate chips)
1 c. (4 oz.) coarsely chopped walnuts
1 c. (4 oz.) chopped toasted pecans

Heat the oven to 350; line a couple of cookie sheets with parchment or foil. In a large microwave-safe bowl, melt the chocolates and butter in 30-second intervals; this will probably take 1-1/2 minutes. Stir in the coffee, baking powder, and salt; then stir in the sugar and vanilla.
Beat in the eggs, one at a time, until well combined. Add the flour, mix until barely combined, then add the chocolate and nuts. You will have a chunky, gooey dough. Spoon it out by the heaped teaspoonful onto the parchment-lined cookie sheets: if you're not too generous, you should get about 24 cookies. If you are more generous, that's OK too. Bake these for about 8-10 minutes, or until barely set. Let cool on racks and get ready for the chocolate show.

Thursday, November 11, 2010

Carrot Cake

If Alicia were reading/posting on this blog, I would be sure to hear plenty of righteous indignation about what I did with this recipe, as I did when I made cupcakes from the chocolate layer cake recipe. And maybe I will still get a dose of indignation. You see, instead of the three-layer masterpiece with the marzipan carrots on top that you see front and center on the cover of Maida's cookbook, I made a snack cake. A delicious snack cake.

There are only four people in our house, and we had three cakes in the house this week. Two of them are my fault, I admit. But we weren't having a party, and I have limited refrigerator space and even more limited freezer space. So carrot snack cake it was. And we were all happy.

Making a carrot snack cake is about easy as making muffins. Once you've grated the carrots, you've done half the work. This cake involves raisins but not pineapple, which a lot of recipes include but I don't really "get". I liked the raisins because they mean there's more cake for me.

OK, so far, no beauty contests. And look! You can still see the carrots. To me, that's a plus. I want to firmly believe I'm eating health food here.
Oh, oops. Not so healthy after all. Cream cheese and butter.

I need to figure out what it is about French cream cheese that makes it so liquidy upon beating into a frosting. I really don't want to pay 3 times the going rate for the real Philadelphia stuff.

So it's dripping and running. So we couldn't wait for the cake to chill as Maida implored us to do. We cut it warm (well, room temperature) from the pan and devoured it--or at least some of it. And it was (still is!) good. It's good both warm and cold. And there's room in my fridge for a square pan. At least until the next cake comes along...

Here's the recipe as I made it. If you double the recipe, you can make a three-layer masterpiece. You'll need to chill the layers before frosting because they're delicate. And I'm sure there's a website out there somewhere that will show you how to make marzipan carrots...

Carrot (snack) Cake

2 large eggs
1 t. vanilla
1/2 c. (3.5 oz.) sugar
1/2 c. (3.5 oz.) brown sugar
10 T. (5 oz.) vegetable oil--I used a bit of hazelnut oil and the rest grapeseed oil
1 t. baking powder
1/2 t. baking soda
1/2 t. salt
1 t. cinnamon
1-1/2 t. cocoa powder
1 c. minus 1 T. (3.75 oz.) flour--I used about 1/3 whole wheat flour
1/2 c. (2.5 oz.) raisins
1/2 c. (2.7 oz.) coarsely chopped walnuts
2 c. (8 oz.) shredded carrots

Heat the oven to 350. Grease and flour a 9-inch square pan. In a medium mixing bowl, whisk together the eggs, vanilla, sugars, oil, baking powder, baking soda, salt, cinnamon, and cocoa powder until everything is well mixed. Now switch to a wooden spoon and mix in the flour--again, just until mixed. Throw in the raisins, walnuts, and carrots and mix those in, too. Easy, right? Pour that into the prepared pan and bake for about 30 minutes (check after 20 minutes just in case) or until a toothpick come out clean. Let the cake cool to room temperature while you bring the cream cheese and butter to room temperature. Then make the frosting:

8 oz. cream cheese (light is fine, though it will make a thinner frosting)
1/4 c. (2 oz.) butter
1/2 t. vanilla
1 c. (4 oz.) sifted powdered sugar

In a medium mixing bowl, beat the cream cheese and butter with an electric mixer until light and fluffy. Add the vanilla and sugar and beat some more until smooth. Spread the frosting on the cooled cake and try to restrain yourself. You should probably store the frosted cake in the refrigerator.

Saturday, November 6, 2010

Scones

It's Saturday morning. It's cold and gray and drizzly, and your daughter has a soccer game at 9. So you haul yourself out of bed a while before you really want to, and you make scones.
Fortunately, these scones 1) come together before the oven has preheated and 2) are really delicious. They're not exactly Power Bars, but at least Julia went off to her game with something warm in her stomach (and this cake) and the knowledge that while I'm not a good enough mother to accompany her to the soccer field (I turn into Deranged Soccer Mom within 50 meters of my offspring playing), I'm at least willing to get up and make something nice for breakfast.

So, to the scones. Unlike some recipes, these have egg and egg yolk in them, which makes them nice and tender. Note also that while the recipe calls for currants, Maida says you can sub out candied ginger and/or walnuts. That was a nice touch--though I'm sure I would have enjoyed the currants.

The butter hits the flour. Again, Maida says you can use some whole wheat flour here, so I did. It's all about appearances.

Here they are, made in France. One of the things that make these scones so easy is that you drop them rather than roll and cut them.
I suppose I could have made 12 daintier scones. Oh, well.

Ten minutes later--golden brown and ready to eat.
It's funny that in 1985, Maida wrote about how scones were all trendy and ubiquitous. Not much has changed. But she adds, and I agree, that no bakery scone is as good as the one you make at home and eat fresh from the oven.

Here's the recipe. Make it and brighten your day.

Scones

2 c. (8 oz.) sifted flour (I used 3 oz. whole wheat and 5 oz. all-purpose)
2 t. baking powder
1/2 t. salt
1/4 c. (1.8 oz.) sugar
6 T. (3 oz.) cold butter, in small dice
1/4 c. (1.25 oz.) currants (and/or minced candied ginger and/or chopped toasted walnuts)
1 egg
1 egg yolk
1/2 c. (4 oz.) milk
More sugar--regular or raw

Heat the oven to 450. Line a baking sheet with parchment or silicone. In a medium bowl measure the flour, baking powder, salt, and sugar; "whisk" with a pastry blender until combined. Add the butter and cut it in to make rather large crumbs. Add the fruit/nut combination you've chosen, the egg, egg yolk, and milk, and mix lightly with a fork until the mixture comes together--don't overmix this. Scoop out 9 to 12 scones with a large spoon and place an inch apart on your prepared cookie sheet. Sprinkle lightly with the sugar and bake for 15 minutes, until golden brown. Eat hot from the oven and hope for victory.

Thursday, November 4, 2010

Triple-Threat Cheesecake

I could also call this the Battle of the Birthday Cakes or Why I Should Always Let My Children do My Food Photography. For the latter, you'll see for yourself. If it's fuzzy and out of focus, I probably did it. If it looks beautiful, chances are it's Julia. See?

But on to the battle. It's Halloween, and we're helping host a Sunday lunch at Sami's parents' house: one of Sami's school friends, his brother, his son, and his 88-year-old pistol of a mom. The mom could be a blog entry unto herself. She takes lengthy hikes through the forest and yet remembers living through the Normandy invasion like it was yesterday. Wow. So far, so good.
So after lunch, we're cleaning up the kitchen, and Sami's mother asks me, "So, what do you have planned for Sami's birthday?"
"Well, I was going to make a cake..."
"Well, I was going to make the cake I always made him for his birthday."
"Ah. What time should we come over?"
How are you going to argue? Number one: it's his mom--the one who caused the birthday to take place. Number two: it's a good cake. My mother-in-law can make it in her sleep, and we always eat it up. It's light and fluffy and definitely not Triple-Threat Cheesecake. Number three: Even if I were to "win", I would still lose. In-laws would push said cheesecake around on their plates, mutter something about "so rich" or "so sweet" and then ask whether I didn't like MIL's cake better.
So what did I do when we got back home? I baked cheesecake. We ate it at lunchtime, before we went over for birthday cake. Who says you can't have one cake and then eat two?

OK, on to the cheesecake. From this dimly lit, poorly focused picture, you see that the usual suspects are at work--cream cheese, eggs, sugar, butter, chocolate. Who could ask for anything more?

Part one: crust. They don't sell graham crackers or even digestive biscuits at my grocery store, so I used some butter cookies. One kind doesn't like to be crumbled. Oh well.

Next comes the cream cheese filling, which I blended in the food processor instead of the mixer so that I'd have fewer dishes to wash.

And now comes the triple-threat part: this chocolate sauce stuff, which involves unsweetened chocolate, semisweet chocolate, and cocoa, along with butter, cream, and coffee. I bet it would be heaven on vanilla ice cream. Maida says that whatever I did, I shouldn't let the sauce fall in globs. Oops.

Finished product. Can you tell who photographed this? Look how cute it is--I halved the recipe and baked it in a 6-inch springform because 1) I don't have an 8-inch springform but I do have this one; 2) we were going to go have more cake later. How much cake can a person handle?


Oh, yeah--that is a birthday cheesecake. I'm sure if I had done better at drizzling the sauce, the chocolate would have been more evenly distributed. No problem--it was still delicious. Pictured above is what was left about 20 minutes after I put the cake on the table. Then Julia had friends over. Then Claire got up early and beat Sami to "his" breakfast piece.
Definitely this was a success overall. Maybe my in-laws lost out by not getting to try this. I just know we gained (tight jeans, I'm looking at you) by having this to ourselves.

Here's the recipe. Cut it in half if you're feeling restrained; do the whole thing if you want more than one piece.

Triple-Threat Cheesecake

1 c. (5 oz.) graham cracker crumbs
1 T. sugar
1 T. cocoa
1 t. cinnamon
1/2 t. instant espresso
2 oz. (4 T.) melted butter

[Before you start anything, get your cream cheese out to come to room temperature.]
If your crumbs are not already crumbly, get out your food processor--you can wipe it out and use it for the cheesecake as well. Also get out an 8-inch springform and butter just the sides. Wrap the bottom in aluminum foil, and find a large roasting pan or casserole dish you can fit the springform in with room for a water bath.
If you're doing the food processor thing, pulse together the graham crackers, sugar, cocoa, cinnamon, and espresso until the graham crackers are finely ground. Then pour in the butter and pulse until that holds together. Turn the mixture into the pan and carefully press into the bottom and as far up the sides as you can go--I couldn't go very far. Let that sit while you make the other stuff.

2 lbs. cream cheese (I've always used a mixture of regular and low-fat)
Pinch of salt
1 t. vanilla
1-3/4 c. (12 oz.) sugar
4 large eggs

Heat the oven to 350. In the bowl of a mixer or food processor, mix the cream cheese until it's perfectly smooth. Add the salt, vanilla, and sugar and mix until that's smooth as well. Then add the eggs one at a time, beating just until incorporated. Set that aside and make some chocolate sauce.

1/2 c. cream
2 oz. (4 T.) butter
2 oz. unsweetened chocolate
3 oz. semisweet chocolate
1/3 c. (2.3 oz.) sugar
1/3 c. (2.3 oz.) brown sugar
2 t. instant coffee/espresso
Pinch salt
1/2 c. (1.5 oz.) cocoa

In a medium heavy saucepan over medium heat, heat the cream, butter, and chocolates; whisk until the chocolate is melted. Then add the sugars and coffee and whisk until they are all dissolved. Take the pan off the heat and mix in the salt and cocoa; whisk until smooth.
Now work faster than I did to make sure the sauce doesn't get thick right away.

Pour half of the reserved cheese mixture into the reserved crust. Now drizzle half the chocolate sauce over that. Pour half of the remaining cheese mixture over the chocolate and drizzle the rest of the chocolate over that. Finally, pour the remaining cheese mixture over all that. If it's not already there, put the springform pan in the larger pan and put that in the oven. Very carefully, pour enough hot water into the larger pan that it's about an inch or so up the side of the springform. Bake for 1-1/2 hours--mine was done after less than an hour, but it was smaller. If you have an instant-read thermometer, you want the temperature to be over 150 but under 160, according to what I've read. Mine was about 156 and perfect. Take the springform out of the water (Careful! Don't get your potholders wet!!) and let the cheesecake cool to room temperature. Then chill 5-6 hours overnight and enjoy the victory.