Friday, September 30, 2011

Prune and Apricot Turnovers


I seem to have hit a sort of phase as I reach the end of this cookbook: the pastry filled with dried fruit phase. There was the apricot strip, there's these turnovers, and I have some raisin-filled cookies coming up. I guess there is an American slant to all these pastries: I'm guessing that the pioneers and such subsisted on dried fruit most of the year. But I'm not convinced they had lovely dried apricots and prunes like these.


No, this seems to be more an Eastern European import--it has a lot in common with hamentaschen and other pastry pockets.


Above all, it's a fun little project (Maida spends more time reminiscing about decorating turnovers with her mother than to actually describing how these taste) that gives you really good results, assuming you like sweet-tart dried fruit conserve in a flaky pastry.


Look at this pastry, people. I almost never get it right, so I'm really proud. Do you see the little pieces of butter showing through? That's what makes the pastry flaky and delicious.
A note: As with the apricot strip, the filling recipe made twice as much as I needed. Given the cost of dried fruit, I have halved the filling recipe here. Otherwise, you're going to have to make some more pastry.


Here's the recipe.

Prune and Apricot Turnovers

You'll need to make the dough and filling well in advance of when you'd like to bake and serve these. Before that, you'll want to soak the fruit--preferably overnight.

Filling:

3 oz. dried apricots
3 oz. prunes
3/4 c. (6 oz.) water
1/4 c. (1.75 oz.) sugar
Pinch salt
1/2 t. vanilla (not in the additional recipe, but I like it)
(2 T. brandy/rum)
(1/4 c. chopped walnuts)

Soak the dried apricots and prunes in the water overnight. Then put the fruit and the water in a small saucepan over medium-high heat and bring to a boil, stirring occasionally. Turn down the heat to medium-low and cook, stirring, until most of the liquid has evaporated. Take off the heat and add the sugar, salt, and vanilla. Let cool completely, then add, if you so choose (and I recommend it!), the booze and the walnuts. While the filling is cooling, make the pastry:

Pastry:

2 c. (8 oz.) sifted flour (some whole wheat is good here)
1 T. sugar
1/2 t. salt
3/4 c. (6 oz.) cold butter (I used 5 oz. and it was perfect. Then again, French butter tends to have a higher fat content than American butter)
1 t. cider vinegar
2-3 T. cold water

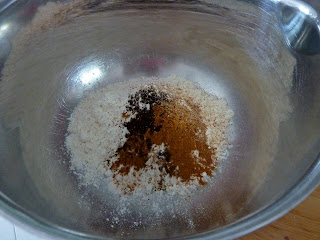
Put the flour, sugar, and salt in the bowl of a food processor and give it a spin to mix. Cut up the butter in cubes and scatter them over the flour. Pulse until the butter is in pieces no larger than a pea. Sprinkle the vinegar and about 2 T. of the water over and pulse until the dough just begins to come together (you may need to add a bit more)--see the picture above. Turn the dough out onto a piece of parchment or waxed paper and refrigerate for at least an hour.

When you're ready to bake, heat the oven to 425. Work with half the dough at a time. Roll it out into a fairly large square--it should be thin, but not paper thin: it's got to hold some fairly substantial filling. Trim the edges to make a "perfect" square and then cut the square into 4 squares. Put some water in a small bowl, wet your fingertips, and wet two perpendicular edges of the square. Put just a teaspoon or two of filling in the center of the pastry square and then fold the dry corner of the pastry over the wet corner. Crimp with a fork. Repeat. If you want, you can cut out fancy shapes with your pastry trimmings and apply them with more water. Or you can use them to make cinnamon swirls, as you see I did (roll up pastry with cinnamon sugar, cut, bake). Prick holes in the pastry with the same fork you used for crimping.
Maida says to brush these with an egg wash (1 egg yolk, 1 T. water) before you bake them. I didn't.
Put the turnovers on a piece of parchment on a cookie sheet and bake for 30 minutes, or until golden brown. These are especially good when they're still warm. Maida says they can be frozen unbaked or baked and then re-baked or reheated. I believe it, but I haven't tried it--tiny freezer.

Wednesday, September 28, 2011

California Lemon Pudding


It would seem that after a nice long summer vacation, real life has finally kicked in--just in time for fall. This week involved a full day of volunteer work, a certain amount of editing, my full 15-hour teaching schedule, and a cold that started right around my second class of the day. Oh yes, and I baked.


I have a rather intense teaching schedule that involves two days of teaching six hours straight, plus a night class. It's pretty tiring while it lasts, but it does give me about 3 days off to do other things. And so I've determined I'll bake on one of those days.


This week I made the California Lemon Pudding, touted as being quick and easy as well as light and creamy and lemony. And indeed, it did come together in less than half an hour, right before I had to leave for a parent-teacher meeting.


So when we got back home, there was pudding (thanks to children who know how to take food from the oven, etc.)! That's definitely a nice weeknight bonus. 
The verdict? I liked this but didn't love it. The top layer is nice, like a light cake, but the pudding on the bottom was a bit too floury for my taste. Maybe it didn't chill enough. I also found it to be a bit too sweet. However, no one actually complained about it, and all 5 little cups disappeared rapidly. So I would recommend it, with less sugar, if you want something just a little special that comes together quickly.

Here's the recipe.

California Lemon Pudding

1 T. (0.5 oz.) soft butter
3/4 c. (5.25 oz.) sugar, divided (consider going down to about 1/2 c. or 3.5 oz.)
2 large eggs, separated
Grated zest of 1 lemon
1/4 c. (2 oz.) lemon juice (consider using more lemon juice in place of some of the milk)
2 T. flour
1 c. (8 oz.) milk

Heat the oven to 350. Get out about 5 custard cups and a large pan that can hold them and some water. Butter the custard cups and go ahead and put them in the pan. In a small bowl, use a hand mixer to beat the butter with 1/2 of the sugar (it will remain grainy, given the proportion of butter to sugar) until mixed. Beat in the egg yolks, then the lemon zest, lemon juice, flour, and then the milk, gradually. Wash the beaters and put the egg whites in a clean bowl with a pinch of salt; beat until they hold a soft shape. Add the remaining 1/4 c. sugar gradually, beating until the whites hold a fairly stiff shape. Gradually and carefully fold the egg whites into the lemon mixture. Pour the mixture into the buttered custard cups.
If you have an electric kettle, this is a great use for it. While you're making the lemon batter, heat up a kettleful of water. When all is ready and the water is hot, put the pan with the custard cups in the oven and then pour the water in from the kettle to about 1 inch up the pan. If you don't have a kettle, well, pour hot water into the large pan using your favorite technique. Bake for about 35 minutes (check after 25) until they are puffy and golden (see picture). Remove the cups from the water and let cool (they'll settle quite a bit). When they have cooled to room temperature, refrigerate them. Maida says they're best 3 hours after you bake them, if you can plan your day like that. You can either invert the custard cups onto plates and unmold these, or you can be less fancy and spoon them out of the cups. Guess which one we did? Celebrate that you have a little something for dessert.

Monday, September 26, 2011

Ginger Ginger Cake


It would seem from all the ginger recipes in this book that the 80's were a prime time for desserts with fresh and candied ginger. Since my mother took Chinese cooking classes in the 70s, those ingredients had become a staple in our house, but they were still pretty exotic and "nouvelle cuisine" in the 80s--so much so that I believe we had to go to the Asian food store to buy them. Now when I go to the market stand and ask for candied ginger, the vendor asks me to choose from three different kinds! Times have changed. But this remains an outstanding recipe.


 Like the Apricot Strip a couple of weeks ago, I took this cake to a gathering of new expat parents where they could gather important information and share experiences. And drink coffee and eat cake. There were lots of delicious goodies on hand. But I have to brag that I was unable to bring any cake back home with me.


In fact, the cake disappeared so fast I was unable to get a good photograph of it! As it was cooling on the table, little gremlin hands started picking at it. Children emerged from their rooms to ask if they could have "just one slice". And that one slice became a quarter, then a third, then half a cake. Finally, I had to slice it up and put it away so that there would be something to take to the gathering!

So to describe the cake: it's definitely not gingerbread, and although there's an insane amount of ginger in it, it doesn't hit you over the head. Many of the tasters commented on its subtlety. In fact, one woman insisted that the recipe could not possibly be American--I'm not sure if that was because of the subtlety or because there was no cinnamon in it. No matter--the cake is moist and buttery and delicious. Claire, the resident ginger fan, has claimed it as her birthday cake. If you love ginger, or even like it, you should make this cake.

Here's the recipe.

Ginger Ginger Cake

1 cup (8 oz.) butter, room temperature
1/4 t. baking soda
3-4 oz. fresh ginger (3-4 x 1 inch), finely grated
2-3/4 c. (19.25 oz) sugar, divided (I used 1 pound, which seemed to be plenty)
6 large eggs, SEPARATED (I almost forgot)
3 c. (12 oz.) sifted flour (I threw in a cup of whole wheat)
1 c. (8 oz.) sour cream
3/4 c. (6 oz.) candied ginger, snipped with scissors into 1/4-inch pieces
Pinch salt

Heat the oven to 350. Butter a large tube or angel food cake pan (I don't see why a Bundt pan wouldn't work here) and coat it with breadcrumbs or wheat germ or ground almonds. Cream the butter with the baking soda until fluffy. Add the ginger and all but 1/2 cup of the sugar and beat for 2-3 minutes or until light. Beat in the egg yolks. On low speed gradually add the flour in three additions, alternating with the sour cream in two additions. Stir in HALF the candied ginger (I forgot about this and added it all. The cake was still delicious.). 
In a clean bowl with clean beaters, beat the egg whites with a pinch of salt until they hold a soft shape. Gradually beat in the reserved 1/2 cup sugar and beat until the egg whites hold a fairly stiff shape--don't overbeat. 
Fold the egg whites into the ginger-filled batter in three additions. The batter is pretty heavy, so don't try to hard to incorporate the egg whites well the first two additions. When all the egg whites have been folded in, pour the batter in the prepared pan and sprinkle the reserved candied ginger on top. Bake in the preheated oven for 1-1/2 hours (mine took a little more than an hour) or until a tester comes out clean.
Let the cake cool in the pan for 10-15 minutes before unmolding it and cooling completely on a rack. Cut into slices and stash away if you want a piece.

Saturday, September 17, 2011

Blueberry Custard Tart


As things have gotten busy around here, my baking has worked its way into two categories: baking with a deadline (for some event or another) and baking as a reward. This tart was my reward for getting through three crazy days of school meetings and work.


 Now, French meetings (at least the ones I've been to) can be quite pleasant. No one is in a hurry, and everyone talks a lot. There is often food or at least coffee involved. People are civil to one another even in disagreement.


And yet, I found myself sitting in meeting after meeting, tuning out and thinking, "OK, just two more meetings and then I can go home and bake something!"


So this is what I baked. Because I had made my piecrust dough ahead of time, it went together really quickly, but it was still a satisfying baking experience. I was especially pleased with my crust, which for a change didn't shrink on the edges (I baked it blind with a vegetable steamer!).


 When the girls got home, they asked, "What kind of quiche is this?" And they were right--this is an awful lot like a sweet quiche (ooh--breakfast quiche!). It's fruity and creamy, and the crust has a nice crispness. And it was gone in under 24 hours.


Here's the recipe. Treat yourself. 

Blueberry Custard Tart

1 c. (5 oz.) unsifted flour (some whole wheat is nice here)
2 T. (0.9 oz.) sugar
1/4 t. salt
1/2 c. (4 oz.) cold butter, cut into pieces
1 large egg

I made the crust in a food processor, though you could also do it in a mixer or by hand. Put the flour, sugar, and salt in a food processor and pulse until mixed. Pulse in the butter until you have coarse crumbs. Then add the egg and process until it holds together. Turn out onto a piece of waxed/parchment paper (if you're going to store the dough for a while) or a rolling surface (if you're going to work with it now--you don't have to chill this dough). Knead it a bit until it holds together, then either store it for later or roll it out now.
Roll out the dough to fit an 11-inch tart/quiche pan, if you have one; I used a regular old 9-inch pie pan. Crimp the edges better than I did, prick the bottom and sides, and put the crust in the freezer for at least 15 minutes (while you preheat the oven).
Heat the oven to 400. Put a piece of foil or parchment over the crust, and then put in pie weights or beans or spare change or another, smaller pie pan or vegetable steamer--just something that's going to keep the crust from puffing on the bottom and shrinking on the sides. Bake for 10-15 minutes. Then remove the foil/parchment and the weights and bake another 5-10 minutes until golden. Turn the oven down to 325 and set the crust aside while you make the filling.

(Optional: 1/2 cup ground almonds or hazelnuts)
2 cups (8 oz.) fresh or frozen blueberries
2 large eggs + 2 egg yolks (in all honesty, I just now see the additional egg yolks. The tart was fine without them. Use your judgement.)
1/4 c. (1.75 oz.) sugar
1/4 t. cinnamon
1/4 t. nutmeg
1 t. vanilla
1 c. (8 oz.) cream

If you'd like, sprinkle the ground nuts on the bottom of the crust. This was my idea, and I liked it. Spread the blueberries over the nuts. Then whisk together the eggs, sugar, cinnamon, and nutmeg. Whisk in the vanilla and cream. Pour that over the blueberries and put in that 325 oven for about 35 minutes; the custard will no longer jiggle. Serve at room temperature or cold (I liked it better room temperature).

Friday, September 16, 2011

Apricot Strip


There are days when I ask myself, "Why are you baking? You really have other things to do that may just be more important!" And then I bake anyway. I never have an answer to that particular question.


This weekend I had a long editing project to work on. I was getting what seemed to be an email every 10 minutes about a volunteer event on Monday (that I was ostensibly baking for). I needed to plan a new class I would be teaching during the week. And we won't even talk about what the apartment looked like.


I was in a state of stress. I snapped at everyone. And yet I baked. Something complicated, even. And you know what? I don't regret it. Everything got done, and there was some delicious cake at the end of the tunnel.


As you can see, this is a very Maida Heatter recipe in that it involves lots of dried fruit and nuts. The idea behind this recipe is that it's a spin on a Fig Newton, but with an apricot-pineapple-walnut filling within a whole-wheat-honey dough.


The recipe is a bit fussy in that you're supposed to make the dough and the filling the day before you make the actual cake. I didn't have all the ingredients for the filling the night before (which stressed me out no end), so I made it a few hours before, and it was fine.


I was so out of time that I brought the dough and filling over to my in-laws' house and fixed it on the outside table (great light for photography, though!)


 But you see how it goes: Roll out the dough, pile on some filling (you could make a half recipe and it would be enough, honestly), fold it over, move carefully to a cookie sheet, repeat.


The result? It was really good. The filling is something I could (and did) eat with a spoon, though I would put in the orange rind at the end so it doesn't get that cooked taste. The dough really does taste like a Fig Newton, in a good way. And these were popular! My friends Cécile and Gabrielle could pick my cake out of a line-up of desserts other moms made (I think it's the dried fruits and whole wheat flour), and Gabrielle mercilessly promoted the cake and my "magic baking". People seemed to like it a lot, or at least they were polite, and almost all of it disappeared. And when I brought the cake home, Julia pronounced it "so freaking delicious". Can't go wrong with that!

Have I learned anything? I should probably manage my time better. But still, given the situation again (and I probably will be this weekend), I would totally bake. All that other stuff can (probably) wait.

Here's the recipe. Make it when you have time.

Apricot Strip

First, soak your apricots as long as possible, preferably overnight:

12 oz. dried apricots
1-1/2 c. (12 oz.) water (if this is last minute, boiling water may be called for)

Let sit (in a saucepan if you have one you can spare for a while), keeping the apricots under water. Now get to work on the dough.

1/2 c. (4 oz.) butter, room temperature
1 t. baking powder
1/2 t. baking soda
1/2 t. salt

1/2 c. (3.5 oz.) brown sugar
1/2 c. (5.5 oz.) honey
1 large egg
1 c. (4 oz.) sifted flour
2 c. (11 oz.) unsifted whole wheat flour

I did this with a food processor, but you could also do it with a mixer. Beat the butter with the baking powder, baking soda, and salt until fluffy. Beat in the brown sugar and honey, and then the egg. Pulse in the two flours (or beat in at low speed). Wrap the dough in waxed or parchment paper and put in the fridge, preferably overnight. Now it's time for the filling.

1 large organic orange
2/3 c. (3 oz.) golden raisins
1 c. (7 oz.) sugar
1 15-16 oz. can crushed pineapple in juice
1 c. (3.5 oz.) walnuts in medium-sized pieces

Take the apricots you soaked last night, and if they're not already in a heavy medium saucepan, put them in one (don't drain them). Finely grate the zest of the orange into a small bowl and set aside. Now peel the orange and cut it into segments. Put the segments and squeeze the juice in with the apricots. Add the raisins, sugar, and pineapple (if you can only find rings, like me, just give them a rough chop) with its juice. Put on the stove over medium heat and bring to a low boil. Then turn down the heat and simmer, uncovered, until all the liquid has evaporated. This takes a long time but only requires occasional stirring, so you can do other things while you wait. When it's thick and jam-like, take it off the stove and let it cool down to room temperature. Then add the walnuts and the reserved grated orange rind. You can either refrigerate the filling for later or use it now. You are ready to assemble the cakes.

Heat the oven to 400. Lightly flour a pastry cloth or other rolling surface. Get the dough out of the fridge and cut it in half (put one half back in the fridge). Roll out half the dough into a rectangle that should theoretically be 15x6 and perfectly straight. If you see the pictures above, you'll know that didn't happen to me--mine was too short and too wide--and it worked fine. As pictured above, spoon some filling down the center of the dough. Remember that if you made the full recipe for filling, you're not going to get even close to using it all, so don't go overboard. Fold one long side over the filling, then the other one. Press shut at the ends. Using a big spatula or a bench scraper, carefully flip the roll onto a sheet of parchment paper (it's helpful to have an extra pair of hands for this). Repeat the process. Maida wants you to shape and bake these one at a time, but I found that two fit easily onto a baking sheet and baked just fine.
Bake these for 15-18 minutes, or until light golden and firm. Carefully transfer to racks to cool. When you're ready to serve these, use a serrated knife to slice them (at a diagonal is nice) at the thickness you like. Maida says each roll should give you 6-9 slices, but I'm pretty sure I got at least 12 from each. Enjoy with a nice cup of tea and some new acquaintances.


Sunday, September 11, 2011

Chocolate Miracles


On their last free day before school started this week, Julia and her friend Alice came home and wanted to bake. "Is there a Marie K. Hardy recipe we can make?" asked Alice. There was.


I had to send the girls out to the corner store for condensed milk, and then they were in the kitchen stirring and baking and arguing with "Marie K. Hardy"(Alice's nickname for Maida Heatter) about the correct directions--was a double boiler necessary(no--well, maybe not)? Could they use the microwave (no)?
I have to agree with the girls that a page and a half recipe for three ingredients was a bit extreme.


At the same time, had they paid a bit more attention to what they were doing (and to turning down the heat), they wouldn't have slightly burned the chocolate. That issue plus some pecans that weren't really quite fresh anymore made these cookies a little less than miraculous.


That being said, I still recommend these cookies if you like chewy, chocolaty, nutty goodness. Just be careful when you're melting the chocolate.


Here's the recipe.

Chocolate Miracles

2 oz. unsweetened chocolate
14 oz. can sweetened condensed milk
1 cup (4 oz.) chopped toasted pecans

In a small heavy saucepan over low heat, melt the chocolate. Add the condensed milk, turn up the heat just a bit, and cook, stirring and scraping constantly with a rubber scraper, for about 5 minutes or until slightly thickened. Remove from the heat and whisk until very smooth. Let cool about 10-15 minutes, stirring occasionally, until quite thick. 
In the meantime, heat the oven to 350. Stir the nuts into the chocolate mixture and line a couple of cookie sheets with parchment. Apparently, foil will not do here. Place spoonfuls of dough onto the lined cookie sheets and bake for 15 minutes (10 minutes was plenty in our oven). Don't let these get dark brown.
Transfer to wire racks and let cool. Apparently, the texture of these is best within the first 12 hours. I thought they were still quite good a couple of days later.

Friday, September 9, 2011

Peach Cream Cheese Pie


This weekend we fixed a sort of end-of-summer dinner for Sami's parents at their house. We used our grill to cook some lamb, there was yummy potato salad, and I made this cream cheese pie.


Observant readers will note that this recipe is exactly the same as the blueberry cream cheese pie that I made earlier this summer, only with peaches. I kind of planned it this way, knowing there would still be peaches here in September, but no blueberries. 


It's interesting, though--despite being the same recipe, the different ingredients (even the Philadelphia cream cheese that I can now buy here seems different!) makes it seem like a new dessert. The cinnamon in the crust kind of dominated, to the point where my mother-in-law commented, "Wow, Americans sure like cinnamon in their desserts, don't they?"


Still, the pie was a big hit and had disappeared without a trace by the next morning. I recommend you make it soon, before the peaches of summer are gone.

Here's the recipe.

Peach Cream Cheese Pie

1-1/4 c. (5 oz. or 1 cello pack) graham cracker crumbs (I used digestive biscuits)
1 T. sugar
1 t. cinnamon (consider using less)
1/2 t. nutmeg
1/2 t. ginger
Pinch allspice
6 T. (3 oz.) butter, melted
(alternatively: 1 pkg. zwieback
1/4 c. (1 oz.) powdered sugar
6 T (3 oz.) butter)

Heat the oven to 375. Line a 9-inch pie plate with foil. Stir together the graham cracker crumbs, sugar, cinnamon, nutmeg, ginger, allspice, and butter (if you're using a food processor to make the crumbs, just mix it all in the processor). Pat the crumbs in the foil-lined pan to form an even layer on the bottom and as far up the sides as you can go. Bake for 7 minutes. Let cool to room temperature, then freeze at least 1 hour. When the crust is frozen solid, pull it carefully out of the pan by the foil and then carefully peel the foil off. Return the crust to the pan. Keep it at room temperature while you make the filling (especially if you have a glass pan--you don't want it to crack going from frozen to hot!).

12 oz. cream cheese, room temperature
1 t. vanilla
1/2 c. (3.5 oz.) sugar
1/3 c. (2.7 oz.) cream, sour cream, or crème fraîche
2 large eggs

Heat the oven to 350. In a mixer, or in the food processor you just used, beat the cream cheese until smooth. Add the vanilla and sugar and again beat until smooth. Add the cream and then the eggs, one at a time, beating just until smooth but not going for fluffy/airy. Pour the filling in the crust and bake 25 minutes. Let cool to room temperature and then chill at least an hour.

3 large peaches, peeled and thick-sliced
About 1/2 c. (5 oz.) apricot jam
1/4 t. almond extract (I didn't use this because the French put a bit of apricot pit in their jam)

Put the jam in a microwave-safe cup and zap it for about a minute: it should come to a full boil. Strain the jam and add the almond extract. Immediately brush a thin layer on top of the cheese filling. Arrange the peach slices in a decorative spiral (hopefully more decorative than mine) atop the jam, and then brush the peaches with the rest of the jam. Chill at least a few hours or overnight.

Thursday, September 8, 2011

Johnny Appleseed Squares

Ah, la rentrée. Because everyone in France takes a summer vacation, returning from vacation and going back to school/work is as much of a ritual as is going on vacation. There's the ritual traffic jams, the stores opening up, the asking about the other's vacation, the buying of school supplies.  And there are back-to-school events.


 Since I like to feel involved and all, I volunteered to help with a back-to-school event, answering questions from new parents. I also recruited volunteers to help out, and to say thank you, I of course baked cookies.


This is a great back-to-school kind of recipe. It feels healthy because of all the oats. It's got apples "for the teacher." It's soft and cinnamon-y and comforting.


It's also a very American dessert, because of the heartiness and the cinnamon. The French people at the event distinguished themselves very quickly from the foreigners in reacting to being offered a cookie: my Spanish and Portuguese and American friends (and French friends who had just come back from the States) gobbled them up; the French looked askance and went back to their store-bought madeleines. À chacun son gout (to each his own), I suppose.


I had made this recipe before (I'm pretty sure it's when I lived in Germany, because I had scribbled gram measurements in the margins) and had noted to myself that it was "more like a cake than a cookie." Maybe more like a granola bar than a cookie. But I really recommend it if you want to reward yourself and/or others for making the transition back into the real world--of for having stayed there.

Here's the recipe.

Johnny Appleseed Squares

1 c. (4 oz.) sifted flour (some whole wheat would work well here, I'm sure)
1/2 t. baking soda
1/2 t. salt
1 t. cinnamon
1/4 t. nutmeg
1-1/2 c. (4.5 oz.) rolled or quick-cooking oats
2/3 c. (4.6 oz.) brown sugar
1/2 c. (4 oz.) melted butter
1 large egg
1 t. vanilla
2-3 tart apples that will hold their shape, like Granny Smith or Pink Lady
1/2 c. (2 oz.) chopped toasted pecans

Let me tell you now that I'm giving you my simplified technique for making this, which does not involve rolling the top crust between two pieces of waxed paper and chilling that. My less elegant technique worked for me in the 80s, and it worked for me this weekend.
OK, heat the oven to 350. Line a 9-inch square pan with foil or parchment and butter it (put the butter in the pan, put the pan in the oven for a minute, and then brush the butter around). 
In a medium-large bowl, whisk together the flour, baking soda, salt, cinnamon, and nutmeg. Whisk in the brown sugar (you may want to smooth out the lumps with your fingers) and oats. Then stir in the melted butter, egg, and vanilla. Drop half the dough by spoonfuls onto the lined, buttered pan and use your fingers to press it in a more or less even layer. Peel, core, and slice the apples and layer them on top. Sprinkle the pecans over the apples. Then drop the rest of the dough on top of the apples and again carefully smooth the dough over the apples with your fingers or the back of a spoon.
Bake for 25-30 minutes or until golden brown. Let cool in the pan. Remove from the pan and peel off the foil/paper before cutting into 16-24 squares (Maida suggests these are easier to cut if chilled). Put in a Tupperware and share with your friends who like cinnamon.

Monday, September 5, 2011

Rancho Santa Fe Lemon Tart


A few months ago, I was talking with my friends Gabrielle and Gabriela about the blog--I'm sure it's because I brought some goodie or other to a party. Gabrielle told me about a poem she and her writing group in Prague had once written on the subject of food and wondered if I'd like to use it for the blog. I believe now is the perfect occasion:


Tarte au citron
 (Gabrielle Grieb, Angeliki Freckman, Helen Pletts, Romit Berger, Ariane Synovitz, Clare Wigfall, Emma Whitton, and Jackie Chicknas)


The blade approaches the golden lunar landscape and with its sharp tip penetrates the virgin surface, free falling through the yolk-yellow succulence until it hits the crisp layer of crust.


A firework of sinful flavour explodes, zesty, fresh, tangy and bright, like the bite of a clear winter’s day.


A silky, celestial smoothness slips slowly, leaving a satisfaction that only such pure intensity of taste can offer.


All that remains is an empty plate, a memory and the lingering taste of heaven on the tongue.


Who wouldn't want to eat lemon tart after that? Here's the recipe:

Rancho Santa Fe Lemon Tart

1 egg yolk
1 T. ice water
1 T. + 1 t. whipping cream
1/2 t. vanilla
1/4 t. almond extract
1-1/2 c. (6 oz.) sifted flour
1/4 t. salt
1-1/2 T. sugar
1/2 c. (4 oz.) butter, cold 

You'll want to make the pastry a few hours or even the day before. Whisk together in a measuring cup or other container with a spout the egg yolk, water, cream, vanilla, and almond extract. Refrigerate while you get your dry ingredients together. In a food processor (or in a bowl with a pastry cutter), whisk together the flour, salt, and sugar. Cut the butter into 8-10 pieces and then cut the butter into the flour, processing or cutting until the mixture resembles coarse crumbs. Get the liquids out of the fridge and gradually add them while processing until the mixture holds together (I needed just a bit more liquid). Gather the mixture into a ball on a piece of waxed or parchment paper and refrigerate 2-24 hours.
When you're ready to roll out the crust, get out a tart pan. (Maida wants you to have an 11-inch black metal quiche pan. I had an 8-inch glass pan and didn't feel like shopping for a new one, so I had leftover filling, which I baked in custard cups along with the tart. Yum.) Anyway, on a floured surface, roll out the pie pastry as thin as you can, carefully transfer it to the tart pan, and trim and flute to shape the edges. Prick holes in the bottom and in the sides. If you have leftover dough, you can bake it as cookies (I had "pastry dough gremlins" come eat the dough in my kitchen). Chill the crust for at least 30 minutes.
When the crust has chilled, heat the oven to 400. Line the crust with foil and weight it with pie weights or dried beans or (my favorite) loose change. Bake 20 minutes (10 were enough for me), remove the foil and weights (careful!), and bake another 5 minutes or until the crust starts to turn golden. Take out the crust and turn the oven down to 250 (that would be 120 Celsius). Now go ahead and make the filling.

1-1/2 c. (12 oz.) whipping cream
7 egg yolks (you're now about 4 egg whites shy of an angel food cake!)
1 T. cornstarch
3/4 c. (5.25 oz.) sugar
2/3-3/4 c. (5.28-6 oz.) lemon juice (I used about 5 lemons. Your mileage may vary.)


Measure the cream into a glass measuring cup or other microwave-safe container and zap until it's just ready to boil--probably around 2 minutes. In the meantime, whisk the egg yolks in a somewhat larger glass measuring cup (a 4-cup was fine for me--you want to be able to pour the filling into the crust); add the cornstarch and sugar and whisk some more just until it's incorporated. Gradually whisk in the lemon juice, and then gradually add the hot cream. Strain the mixture into the baked crust. Maida suggests pouring some of it into the crust, then putting the pie in the oven and pouring as much more as possible in at that point. That's probably a good idea. If you have extra filling, you can bake it in custard cups, as I mentioned above. Bake for 1 hour: the filling will no longer jiggle. Let stand until completely cool, and then glaze the tart:


1/2 c. (5 oz.) apricot jam
1 T. (0.5 oz.) Cognac

Heat the jam (30 seconds in the microwave is usually plenty) and strain it. Add the Cognac and brush this all over the tart. Refrigerate the tart and serve cold, with berries or not, with whipped cream or not (we did berries and no cream and it was indeed a taste of heaven). Feel satisfied.